|
7/26/2019 Tent Surgery: Slider Replacement
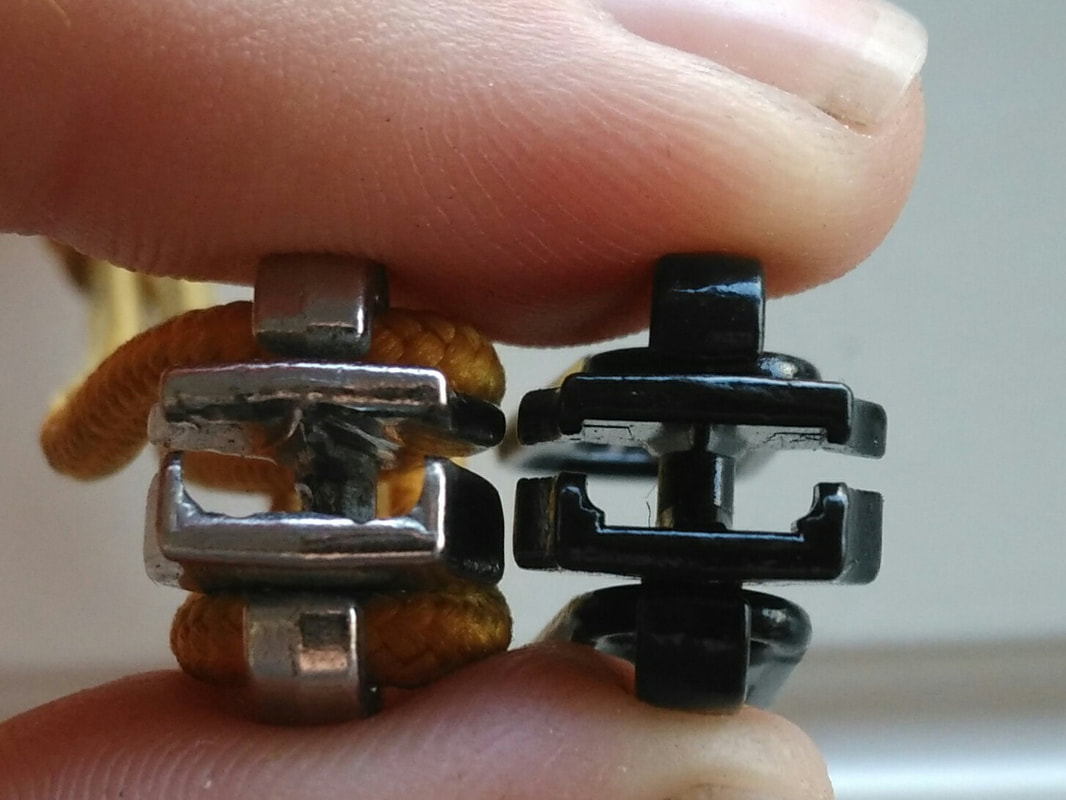
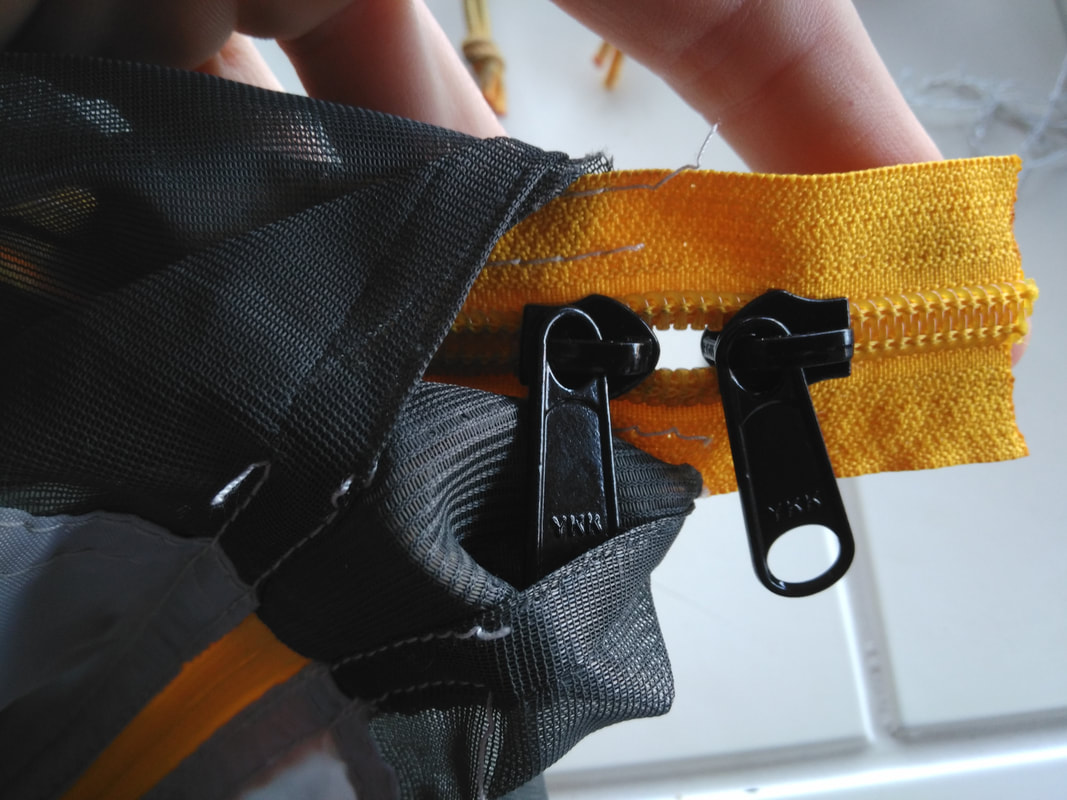
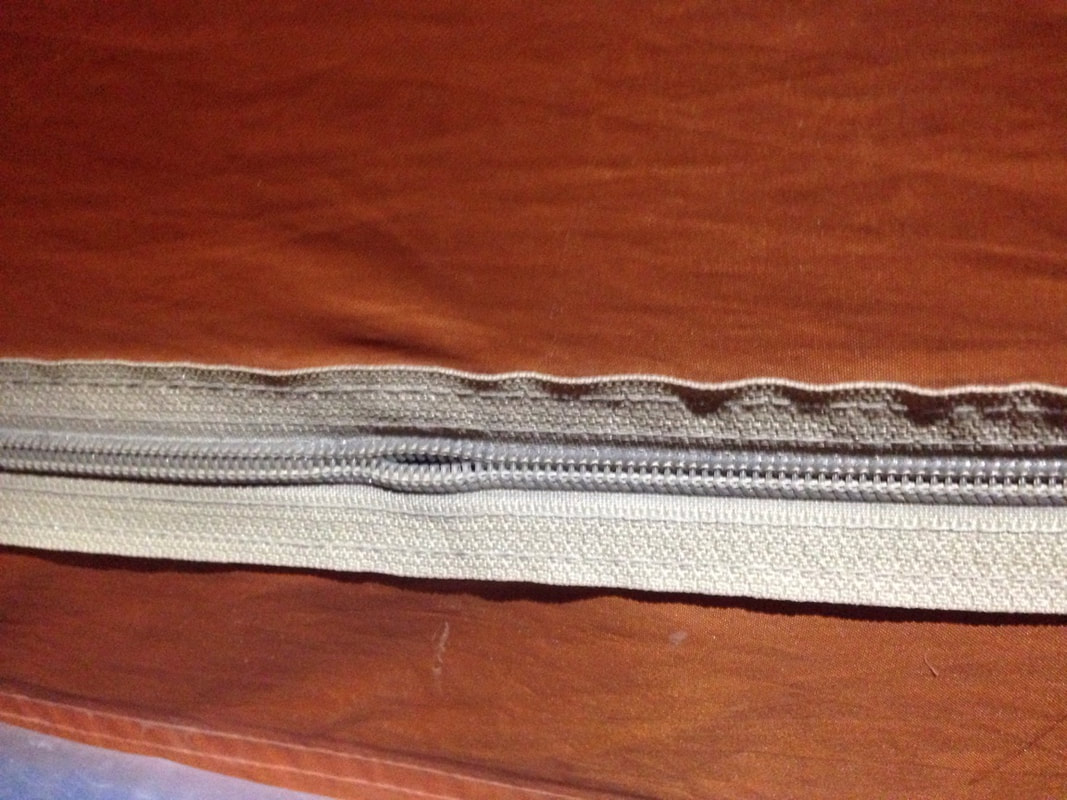
Old worn out slider on the left. New shiny slider on the right.
Now that we have enough experience with it, I feel at least somewhat qualified to offer advice on the maintenance and replacement of the sliders on the tent zippers. Not sure what I'm talking about exactly? What if I asked you, "Does your zipper not shut after you've zipped it?" If you answer yes to that, then it might be time to replace your sliders. If you're still not sure what I'm talking about (it's okay, I didn't either 20 months prior to this writing), then read on, and I'll teach you as best I can. There's all kinds of advice out there on gear, much of it probably better than mine, but this is my (our) blog. I do what I want. In fact, others have already put in considerable effort to educate the masses on the ins and outs of zippers, so I'll be borrowing some of their material for this post. No need to reinvent the wheel, I suppose.
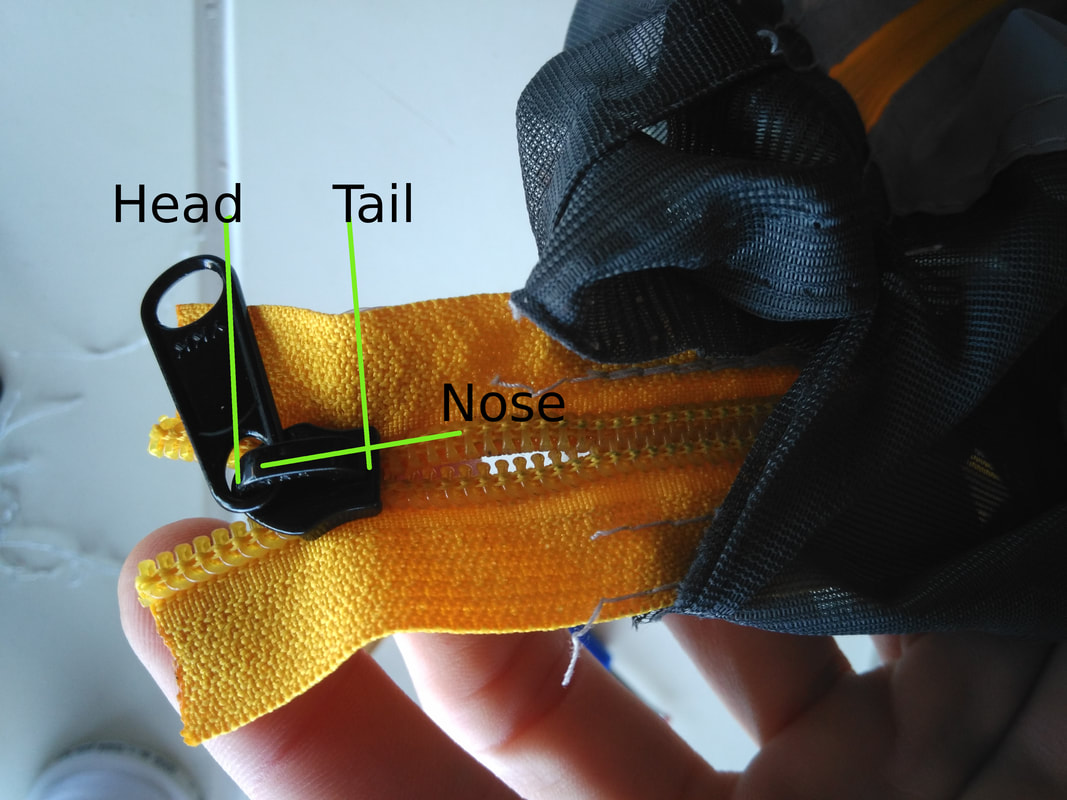
First up, a little bit of zipper anatomy so that you're familiar with the terms I'll be using. Below are two images that I copied from zippersource.com which was one of the stops along my way toward a self-education about zipper styles and maintenance. It illustrates some terms I won't be needing in this post. It also doesn't cover a couple terms that I will be using, so I've made my own image for those.

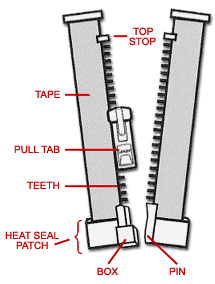
Also of note is that I'll only be talking about nylon coil zippers, as that's the material of zipper on almost all our gear (and most gear in general). We have a few items of clothing with metal toothed zippers and one duffel bag with a molded plastic zipper. I'll just be talking about the nylon coil though. If you are having zipper troubles that I don't cover here, or if you are interested in more information on zippers, https://www.zippersource.com/allabout/ is a decent place to start.
On to the blog post! If you would like to skip the history of our tent zipper woes and get straight to the surgery, scroll down about 3/4 of the way to the picture of me cleaning the zipper with soap and a scrub brush and start reading at the paragraph that begins with "So when I finally set to it..." Neither of us can remember exactly when we first noticed our zippers not behaving as expected. It was somewhere along the Katy Trail, approximately 2 months after leaving Indianapolis. The problem was that the zipper would not shut after using the slider. We figured it was just a fluke, and since the tent was well under warranty, we just tolerated it until we got to Dallas where there was an REI where we could exchange it for a new one. Usually I am in and out of the tent more than Adam is, so whichever side I was using during a given period saw more wear until eventually we were reduced to one "good door." Rather than fight with it, we opted to climb over one another in order to share the good door. Once in Dallas, the exchange was easy, and we were excited to use our new tent, sure that our zipper troubles were behind us. After our luxurious six-week stay with an old friend of mine from Ohio State, my friend's boyfriend drove us the 60-some miles to Granbury, TX where there is a lake (manmade from damming the Brazos river) where one can select from 4 campgrounds at which to camp for up to 10 consecutive days. We elected to stay all 10 nights, and it was toward the end of our stay in Granbury where we started to notice (already!) the first signs of the sliders wearing out. You can imagine our disappointment, especially when in a hurry to use the bathroom, and it takes a matter of minutes to get the zipper to close compared to the second or two it takes to shut a zipper with a functional slider. We each entertained a number of theories. The main one I was sticking with was that I noticed that when I moved the slider slowly, it seemed to behave better. In our experiences since this time (about 15 months prior to this writing), we have discovered that a temporary solution that forces the slider to work is to rotate it slightly (or a lot) so that the slider runs at an angle and not parallel to the track on the head-to-tail angle. The reason I bring this up here is because I wonder if, in moving the slider slowly, some degree of rotation was happening, which forced it to function, speed having nothing to do with it. Each door has 2 sliders, and so with this, our second tent, we were careful to use one slider only on each door until that one wore out, then switch to using the other one. 
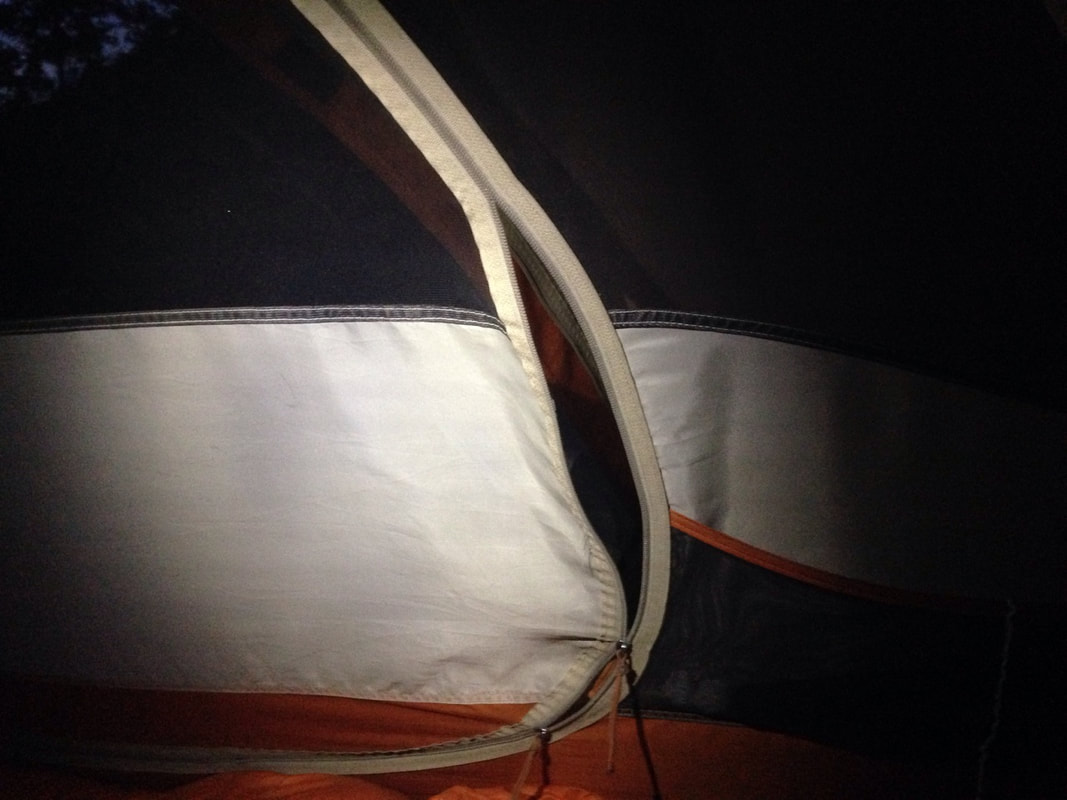
Before the pinching phase, there is a micro-phase where rotating the slider as pictured can do the trick.
We scratched our heads and the constant zipper troubles proved to be a source of irritability (for me, at least) for the next 6 weeks to Roby, TX, where we finally took to the Internet. It was then that we discovered that a pinch to the slider on either side of its nose can serve as a temporary fix until you can make the repair. Thus began our days of pinching the sliders to force them to work. You can, of course, pinch it too hard, rendering the whole thing useless, so if you do this, it is better to pinch it not enough than too much. You can always pinch it again. Adam was usually the pincher at first as I was resistant to pinching because of the risk and paranoia that overpinching would lead to...I dunno what...the end of the world? I practiced on an old jacket first that was having the same problem, and it seemed to do the trick. We had been using the jacket as a ground cover for sitting, and the slider not working was the only reason I replaced this (purple!) jacket. Had I known how simple the fix was, I might still be wearing this jacket!
As we crossed Texas and made our way up through New Mexico to Santa Fe, the sliders often came up as a topic of discussion because they were our biggest, most consistent problem (which puts us in a pretty good position if that's our biggest problem, eh?). Everyone we told about the zippers not working said, "Yeah, that's not a surprise," whenever we mentioned "It's an REI tent," thinking that would give the sliders some credibility. Apparently not many folks think too highly of REI brand tents. In this case, I'd have to agree as far as the zippers go. The sliders didn't have any kind of markings or brand on them, which implies that it must be so crummy that they don't want you to know.
Still, somehow, we had not come across the notion to simply replace the sliders on the tent, which turned out to be a good thing because we are now the proud owners of a North Face Storm Break 2 tent which is a mere 1" shorter (head to toe) than our REI Passage 2, but its walls are more vertical giving us much more shoulder-room so that we're not cramped when we hang out in the tent together. We are much happier campers for it. It was toward the beginning of our 4 month stay in north-central NM that we made the switch from the REI tent to the North Face tent at an even price exchange. REI has great customer service! We were outside their 1 year return window.
Adam did most of the research on the details for a new tent, doing especial research on the zippers. He noted that North Face uses SBS brand zippers. SBS, a Chinese company, if you didn't know, is the world's second leading zipper manufacturer and has, in the last 20 years made leaps and bounds to catch up with, YKK, a Japanese company, the world's leading zipper company. We figured that any brand at all would fare better than REI's no-brand-given zippers. I can't begin to describe the satisfaction we both enjoyed when sliding open the zipper for the first time on our new tent. I had to resist the urge to zip and unzip the door just for the enjoyment of being able to. The elation would not last. After about 2 months, we started having to pinch the zippers again which induced a wave of woe in me owing to the notion that we would have to be troubled with replacing our tent every two months which seemed a ridiculous, impossible, wasteful, and definitely frustrating situation. "Why can't anyone make a zipper that works?!?!" I would yell, despite Adam's consistent and calm reasoning that most people use their tent only once a year at most on a weekend camping trip, whereas we live in ours. We also came to notice that when unzipped below a certain point, the slider would have trouble closing the teeth below and up to that point. Our doors unzip almost 360 degrees, except for a few inches on one side where the door and zipper come together. The sliders work well on the top 180 degrees, so when it's "pinch-time," we avoid going below the halfway point. We took to the Internet again, this time specifying in our search terms that it was our TENT zipper that would not close. I came across a couple of key articles, the first of which suggested a universal-type of replacement slider that screws on and has horrible reviews. I was uneasy about spending $10 on a single slider. The other article I came across suggested tent surgery: removing stitching to reveal the zipper end, sliding the old sliders off and replacing them with new ones. All you need is a measurement of the width of the chain to tell you which size of slider to buy. In the past year, I have always consulted with my acquaintances on Ravelry (a website for the fiber arts (knit, crochet, spinning, and weaving)) in the off-topic forums for gear repair because the gals I talk to on there are thrifty and have a lot of camping and gear repair experience compared to me. One of them kindly looked in her gear repair book to confirm that they suggest the tent surgery method to deal with the "worn out sliders" situation. In looking back on my posts on Ravelry from last summer, I see that I was pretty convinced that simply cleaning the teeth would at least help the situation, but really the sliders just needed to be replaced. I knew this and had measured the chain, discovering that, according to the SBS website, I needed a #7. I searched Amazon and Ebay high and low with no #7s in sight! I even contacted SBS asking if it would be possible to order 12 #7 sliders--I don't think they do direct-to-consumer business as I received no reply. They probably got a pretty good laugh in the office the day they read that email. A helpful Raveler suggested a zipper supply company which I will not name due to the content which I am about to share. I had already come across this company in my search for a solution to our zipper woes. At her suggestion, I figured an email couldn't hurt, so I wrote to them, explaining that I need SBS #7 but couldn't find them anywhere and can they help me or do they otherwise have any suggestions, and this was their reply, which, at the time, I was annoyed with, but now I find rather comical: Thanks for the email. I am sorry. SBS is a Chinese zipper company. We only sell YKK and the zippers and sliders are made in USA and not interchangeable. YKK does not want [their] name on an imported zipper. We will not be able to help this time. Have a nice day
Apparently YKK has a little "older sibling" issue to work out there.
Another Raveler suggested contacting The Rain Shed, a store in Oregon that specializes in outdoor fabric and notions, so I checked out their website and still couldn't find the #7s I needed, so rather than dance around, I decided to give them a call. Mind you, it's been over 2 months since "Why can't anyone make a zipper that works?!?!" and we really needed to get our zipper situation taken care of while we had an address to ship to. We were, by this time, visiting my aunt in Phoenix for a couple weeks. The phone call proved to be the answer to my prayers, so to speak. Over the phone, the lovely young lady confirmed that a YKK #5 will work on an SBS #7. Hallelujah! I had come across so many YKK #5s in my searches online, and for perhaps the first time in Internet history, even with the $6 shipping, it was cheaper at The Rain Shed than at Amazon. They even do bulk discounts, so I was tempted to buy 50 sliders...Adam didn't think the extra weight was a good idea. ;-P One more plug for The Rain Shed: Ever the paranoid tightwad, I emailed them pictures of my zipper to double check that I was ordering the right product, and they were very nice in their reply. Further, I was having trouble when I first started installing the new sliders, so I decided to call them for help. The gal gave me the advice that it's easier to slide the sliders on forwards with the zipper open. I had been trying to install it tail first. So when I finally set to it at my aunt's house in Phoenix, I decided to first thoroughly scrub the teeth with a utility brush and some soapy water. In retrospect, this step was almost entirely unnecessary, but probably not completely useless. An occasional cleaning will probably help keep a buildup from forming which will (I think!) help with the longevity of the sliders. Dirt is abrasive. 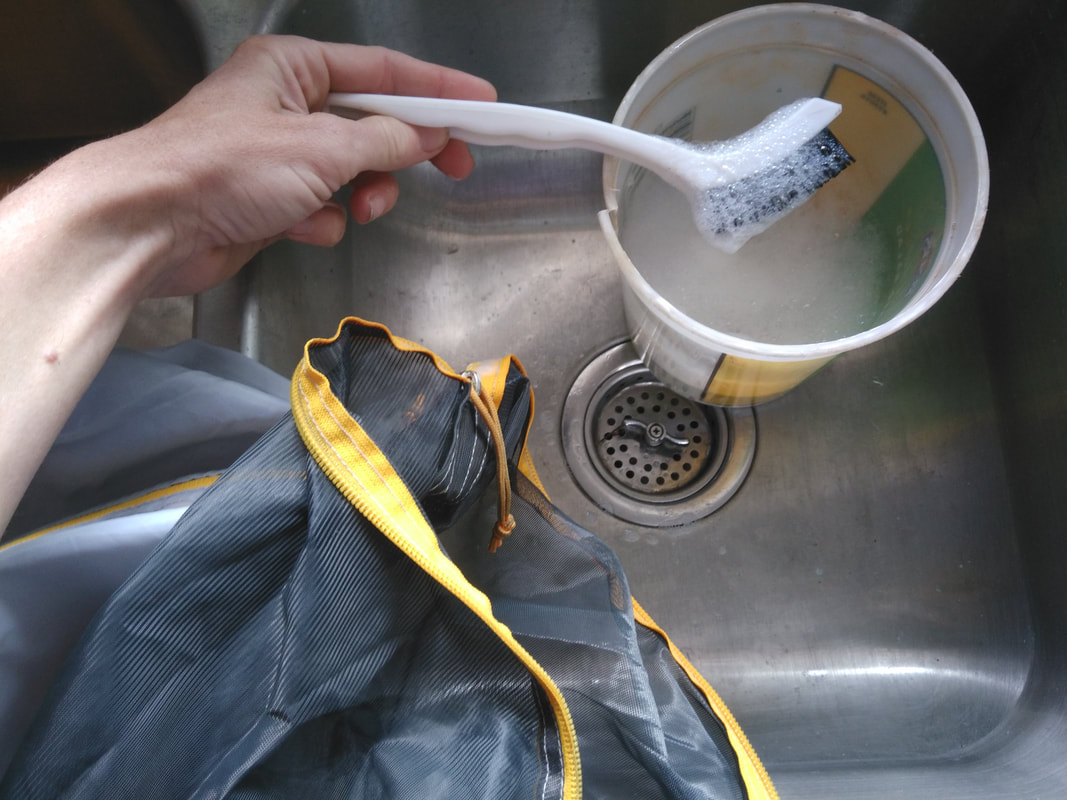
You probably don't need to go to this extent unless you happen to go camping with your tent sideways in a mud puddle ::shrugs::
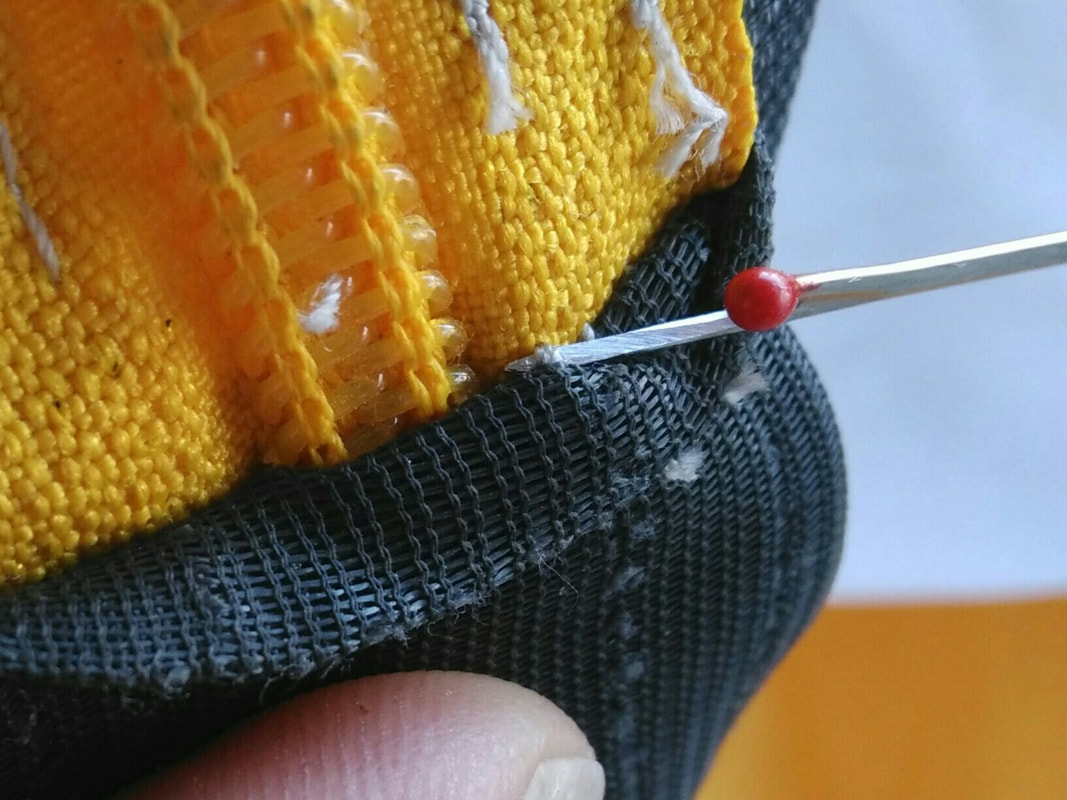
If you decide to endure the tedious task of washing the zipper's teeth, the next step (after it dries, which takes about 8 seconds in Phoenix on account of the arid environment) will be to pick apart the stitches. My favorite tool for this is a seam-ripper which can be found at likely any fabric store or the sewing section of any of the big box stores for only a couple dollars. You'll want to do this carefully, only grabbing the thread so as not to damage the mesh. Especially if it's your first time, be sure to work slowly as there are lots of little tiny hidden stitches, and you won't want to miss them.
Once you have the zipper end exposed, you can remove the old sliders and install the new ones. This is the easy part. Just be sure to make a note of which way the sliders face because in addition to the head and tail ends, there is a front and a back. Worst case scenario: you install it backward and it doesn't work. Remove it, flip it over, and slide it back on. Again, this is easiest with a few inches of the zipper open, installing the slider head first. When you remove both of the old sliders, your zipper will likely be shut. You can pull gently on the ends to open it. After you have the slider installed, you can replace the zipper and sew the it to the mesh again, carefully inserting the needle into the existing holes in the fabric from when it was sewn at the factory. This way, you will do less damage to the mesh. Once you've reattached the first side of the zipper, you can start unpicking the second side and repeat the process, installing the slider head first so that your two sliders are head to head.
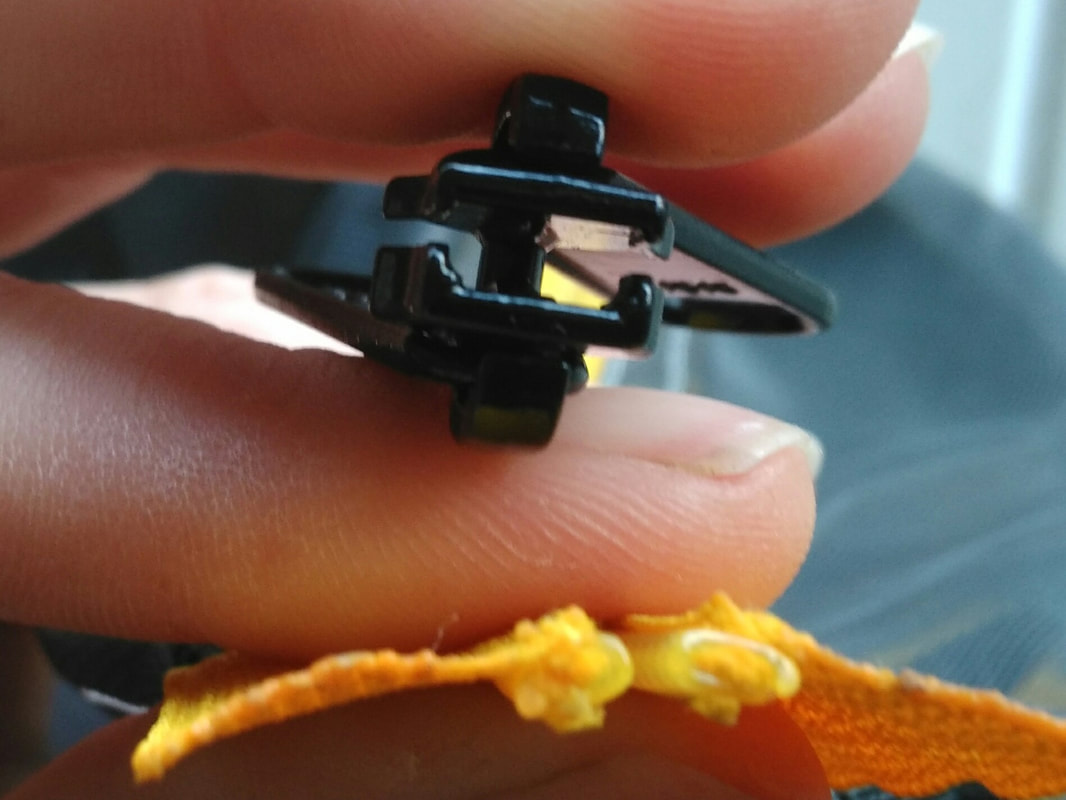
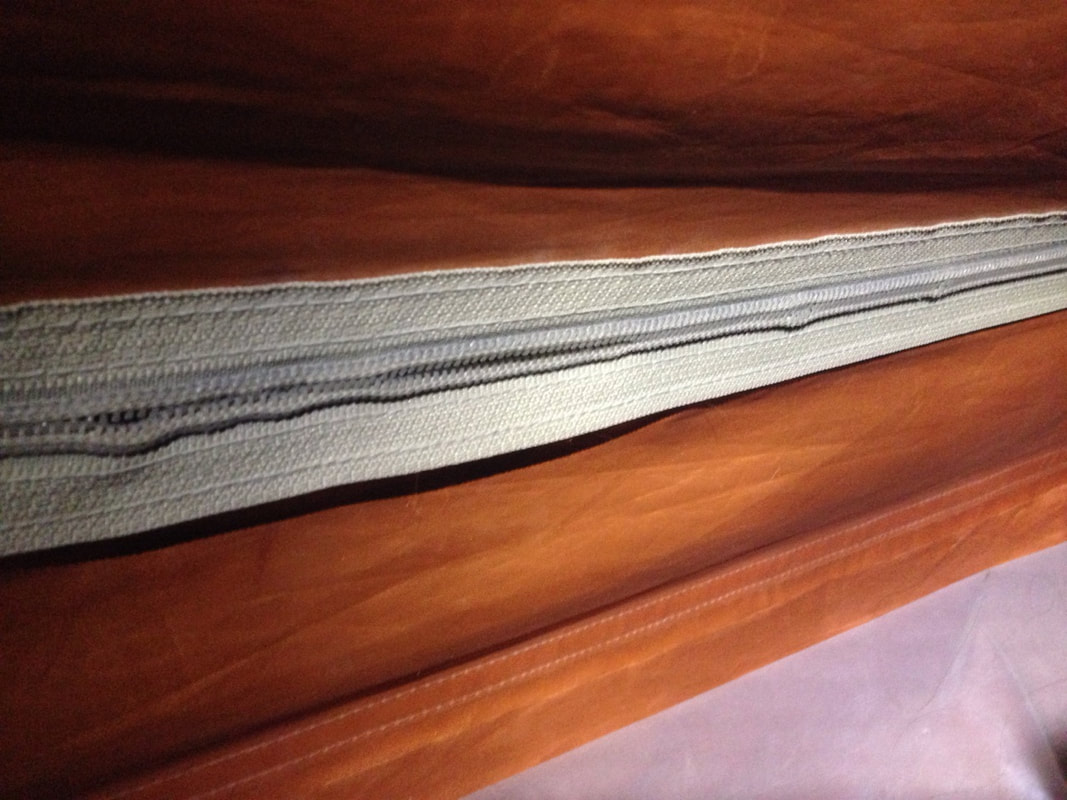
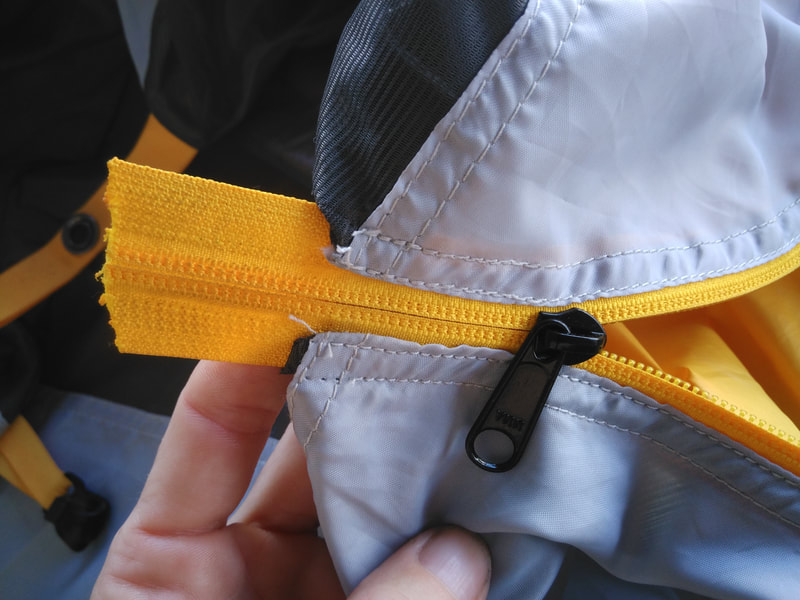
The correct orientation of the slider in respect to the chain.
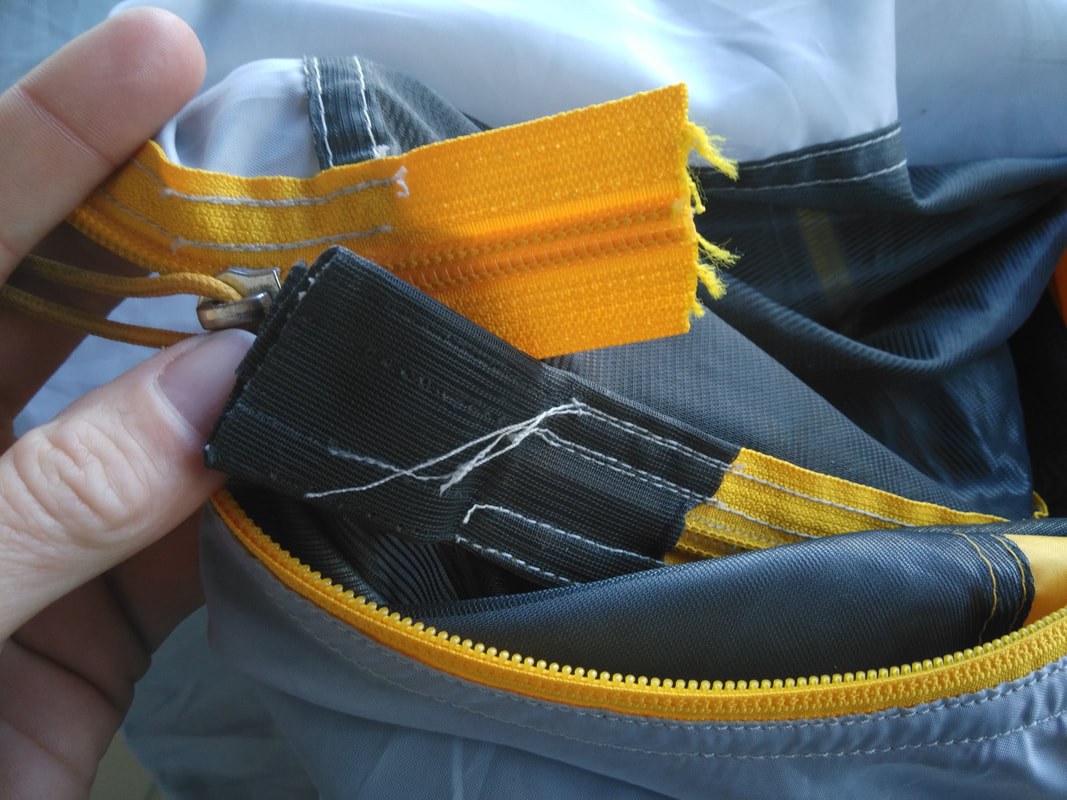
In an effort to prevent wear-n-tear on the mesh, I opted, for the second door, to only undo one side of the mesh "folder" holding the zipper and install the first slider tail first followed by the second one, head first. It's slightly more difficult to install a slider tail first, but if you can manage it, you will only have to perform half the stitch-picking and re-sewing.
For the second door, I managed to install both sliders on the same end of the zipper.
These (YKK) sliders did prove to last a bit longer by maybe a week or two before needing to be pinched, so I can see why the person at the unnamed zipper company chose not to help me...wouldn't want to put pristine perfect YKK sliders on an icky nasty SBS chain.
Including pinching, the SBS sliders lasted about 4 1/2 months. The YKK sliders pictured here lasted about 4 3/4 months, including pinching. So when we were in Prescott, AZ, it was time to replace the sliders again. In undoing the stitching on the first door, I noticed a bit of damage to the window-mesh where it meets the zipper. I could tell right away that re-sewing over the same spot in the mesh every 5 months would eventually break it down, and it would separate, leaving a hole in the mesh, which I could patch with a mesh patch, but sewing the patch on might also damage the mesh. Not wanting to continue this cycle, I brainstormed for a solution that would allow me to avoid sewing the tape back down to the window-mesh. I ended up taking a couple layers of mesh patch-fabric, folding them to the width of the existing mesh "folder" into which the zipper usually goes, and I sewed the patch-mesh to the door/window-mesh, leaving the zipper hanging free. I then folded the patch-mesh up over the end of the zipper and sewed it to the tape. This leaves a considerable hole for insects and arachnids to enter, so our solution (so far successful) was to cram a plastic sandwich baggie into the hole. After 3 months, we have not noticed an increase in unwanted guests into the tent.
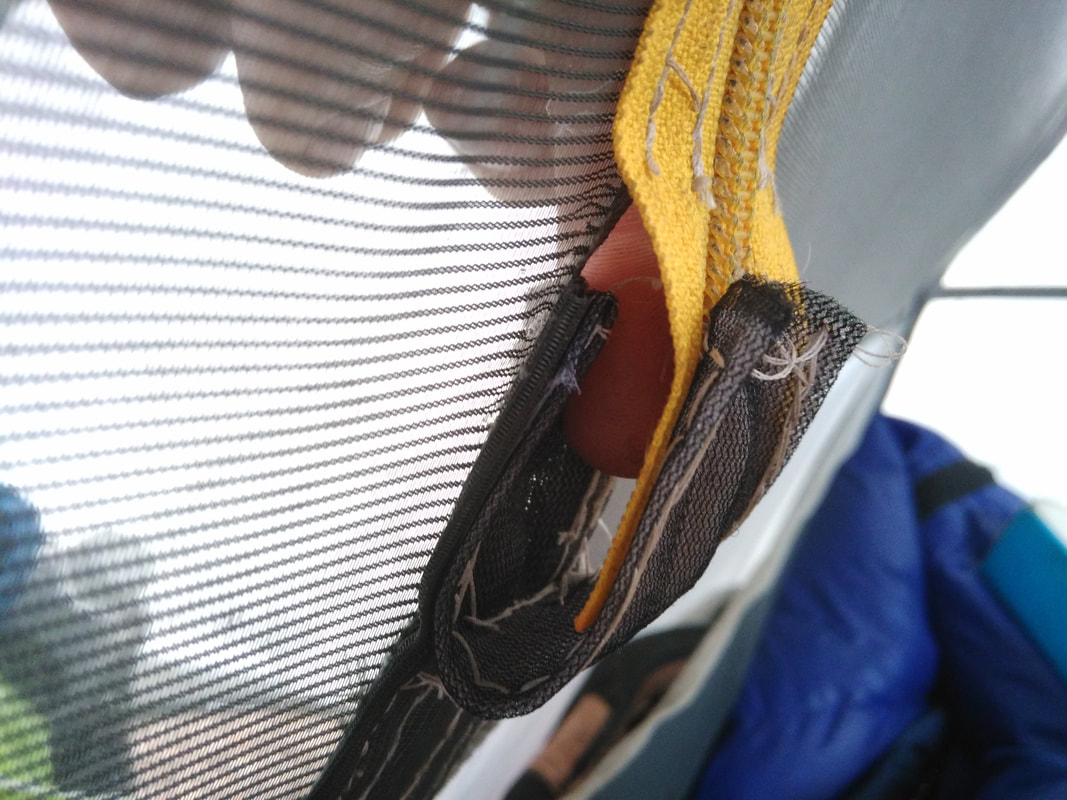
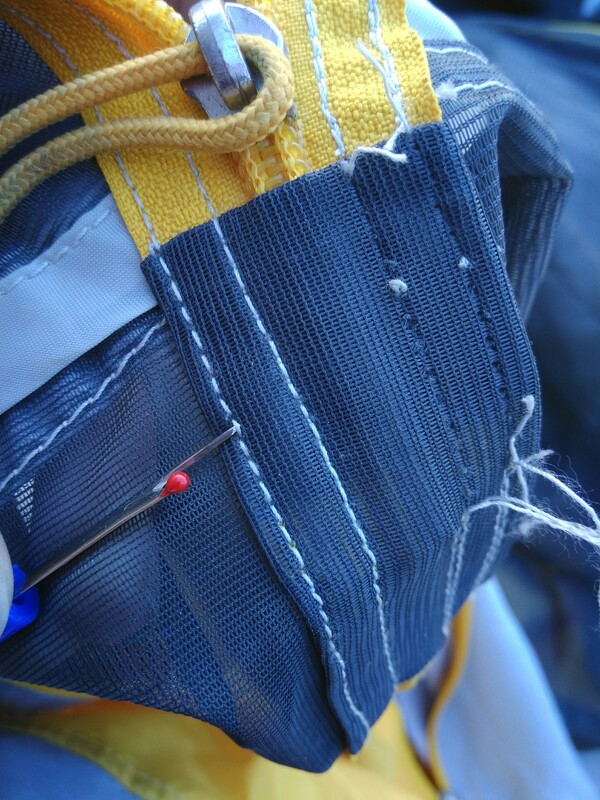
Oh no! A giant invader! Wait...that's just my finger.
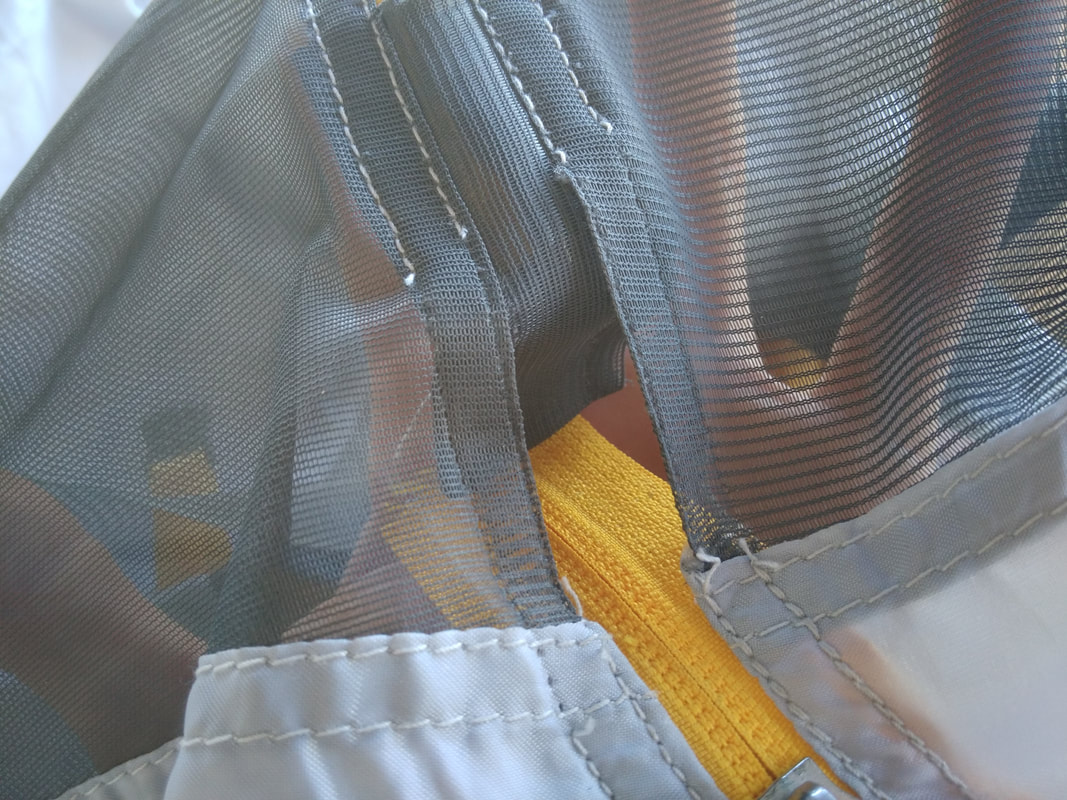
I did the second door the next day, and overnight, came up with what I think was a better long-term solution: I simply snipped what I keep calling the mesh "folder" along the chain to expose it. This leaves the chain permanently exposed, but it is much less destructive and leaves little to no gap for invaders. It does make installing the sliders more difficult, as the zipper is more restricted, but it is a task that only needs to be completed 3 times a year at most, so it is a tolerable solution to me.
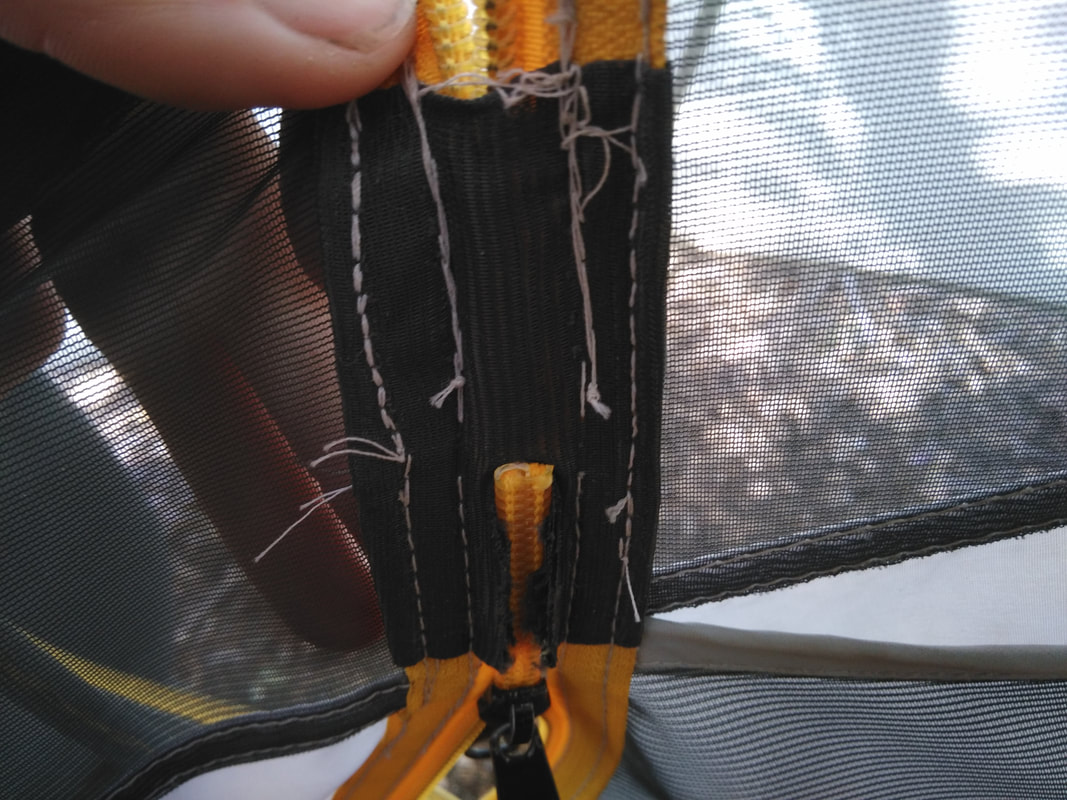
Cutting the mesh and leaving the sewing intact will, I think, be better for the window/door mesh in the long run.
|
Archives
February 2024
CategoriesAll Eats Gear HSFRL Lifestyle Nugs Opinion Patterns Recipies Travel 
|


 RSS Feed
