|
4/27/2023 Pattern: After the After Party
August 2, 2023 Update: updated the post with "(done)" the tasks which have been completed.
This page is just a placeholder until I am able to compile the written instructions (done), put together some charted instructions, draw up some diagrams and other visual aids, create a photo gallery (done), and get that all into a .pdf for distribution. I hope to have the pattern available by the end of Summer 2023, but that's a lot of work, and I'm not holding myself to a specific deadline. My goal of "Summer 2023" is really just arbitrary. If you are one of the three people who chose to take one of my samples from the food pantry where I left them, and you have come to this page from there, thank you for your interest in my work! One last tip about wearing the scarves: watch out because they catch easily on tree branches, bushes, and likely jewelry as well. Just a fair warning. If you have come to this page and are interested in the pattern, you could bookmark it and check back starting in June or July to see if I've been able to publish it yet. There's a lot of work ahead of me, but I'm looking forward to it! :-D If you scroll to the bottom of this page, you should see a word bank of categories where the word "Patterns" should appear. If you click the word "Patterns," it will bring up all the blog posts for my patterns. Feel free to peruse those, as well as the rest of the website. 
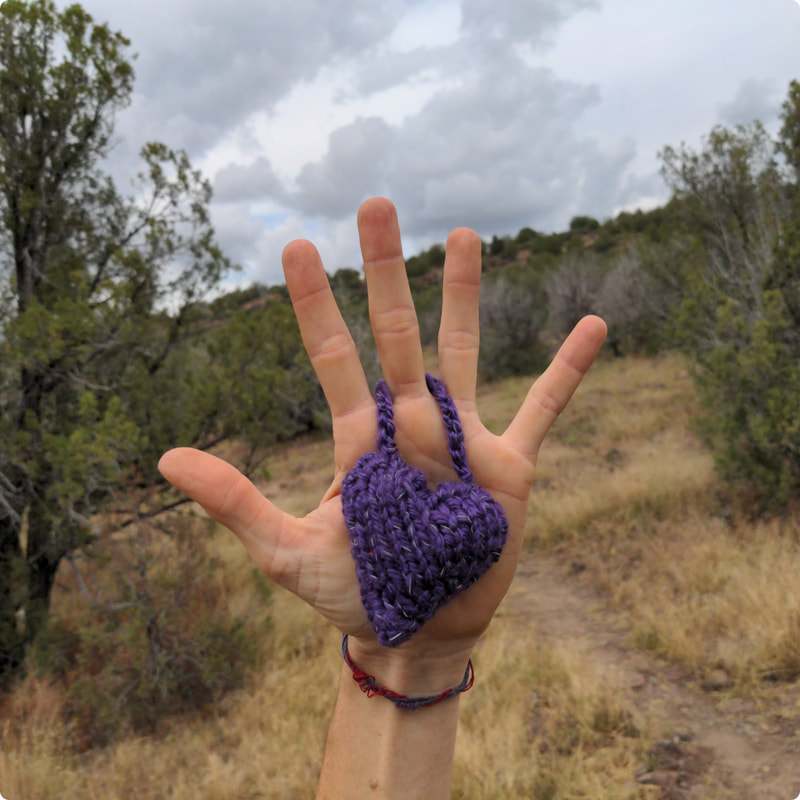
11/13/2022 Pattern: Heartfelt
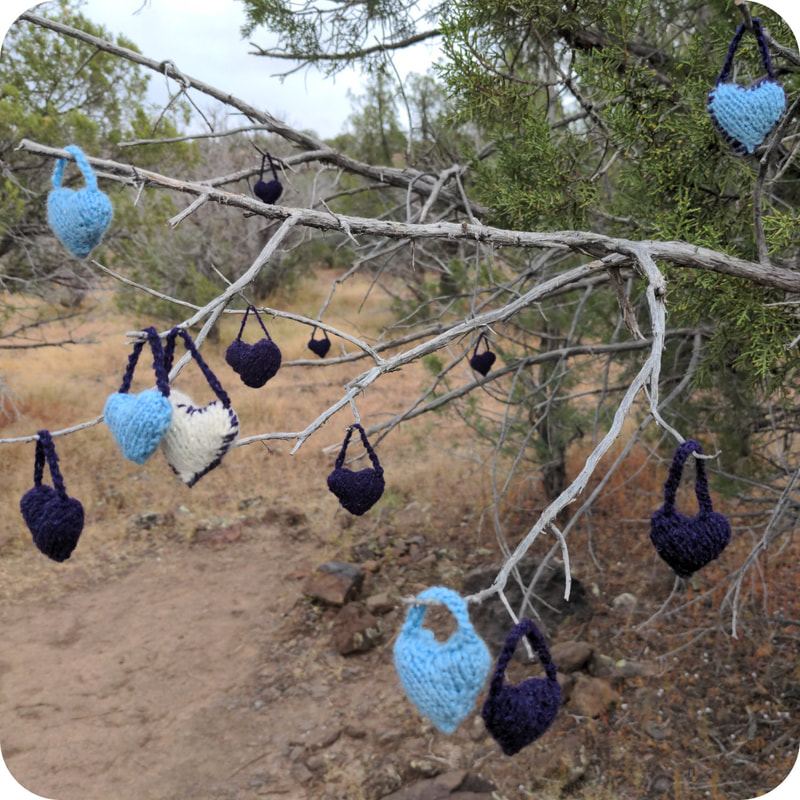
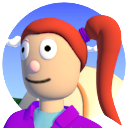
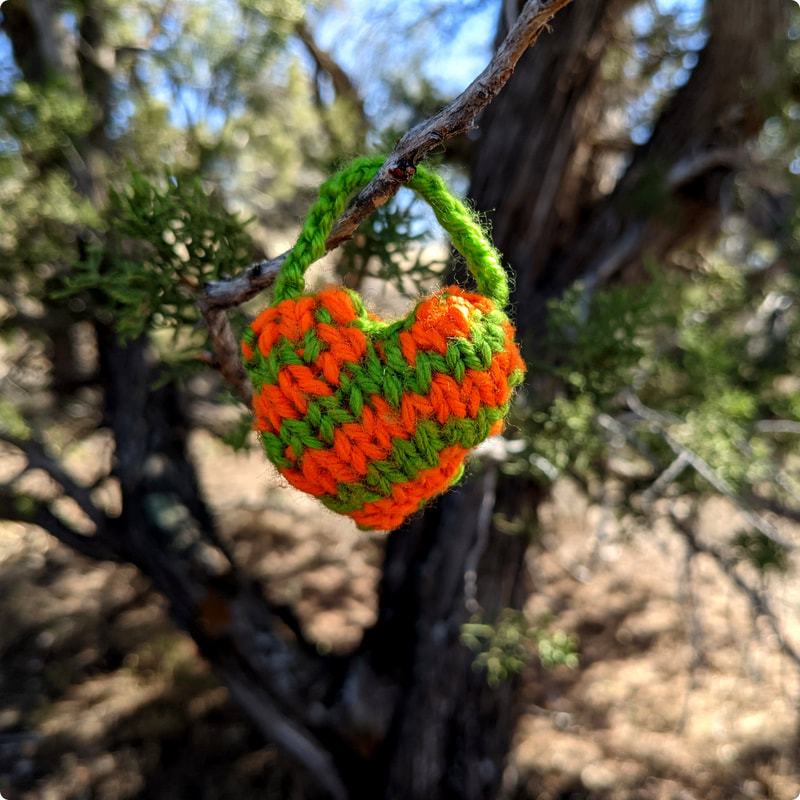
Various sock- to light dk-weight yarns, 2mm needles, 1.25"/2.7 cm across
Click here to download the .pdf directly. Pattern is also available on Ravelry.
Quick Facts: -use any yarn with appropriately sized needles to obtain a comfortably dense gauge -heart is worked in one piece without breaking the yarn and is seamed -heads up: in lightweight yarns, it can be a bit fiddly, especially if you are a tight knitter...an opportunity to practice relaxing your tension :-) -pattern uses short rows to achieve shaping
I first became inspired to create a little stuffed heart when I was in a town of about 500 people. Adam and I had been camping there for about 3 weeks, and I had been visiting the weekly food pantry. Before my last visit there, I wanted to make a little token of my heartfelt appreciation for the ongoing task of running the food pantry.
I didn’t want to just make a heart, I wanted to make a heart that didn’t require breaking the yarn midway through the piece. I noodled around and figured it out in a day. I didn’t write it down because I was sure I wouldn’t forget it. Fast forward a year, and I still hadn’t written down the pattern, but sure enough, I had forgotten it except for a few key points: the beginning, how wide the widest row was, and the overall construction. Armed with some lightweight leftovers and double pointed needles, I set to recreating my little heartfelt token. Over the course of a year, I probably made about 50 hearts or more in a variety of yarn and needle combinations. Those recreation experiments saw me coming to an acceptable shape but then being curious about how it would affect the final piece if I put an increase here instead of there, if I cast on 2 in the middle and added an increase instead of casting on 3 in the middle. There were about 4 sets of instructions I was playing with, all of which made great-looking hearts in the end, but which one was best? Moreover...which sample matched which instructions?! Another spring and part of a summer went by, and my notes laid dormant before I narrowed it down to 2 different variations of the instructions, and now I am finally satisfied and pleased to give you the pattern to create a small token: Heartfelt. I have not tried it, but I would LOVE to see the results if someone makes one from feltable yarn and felts it, truly embodying the pun in the name. 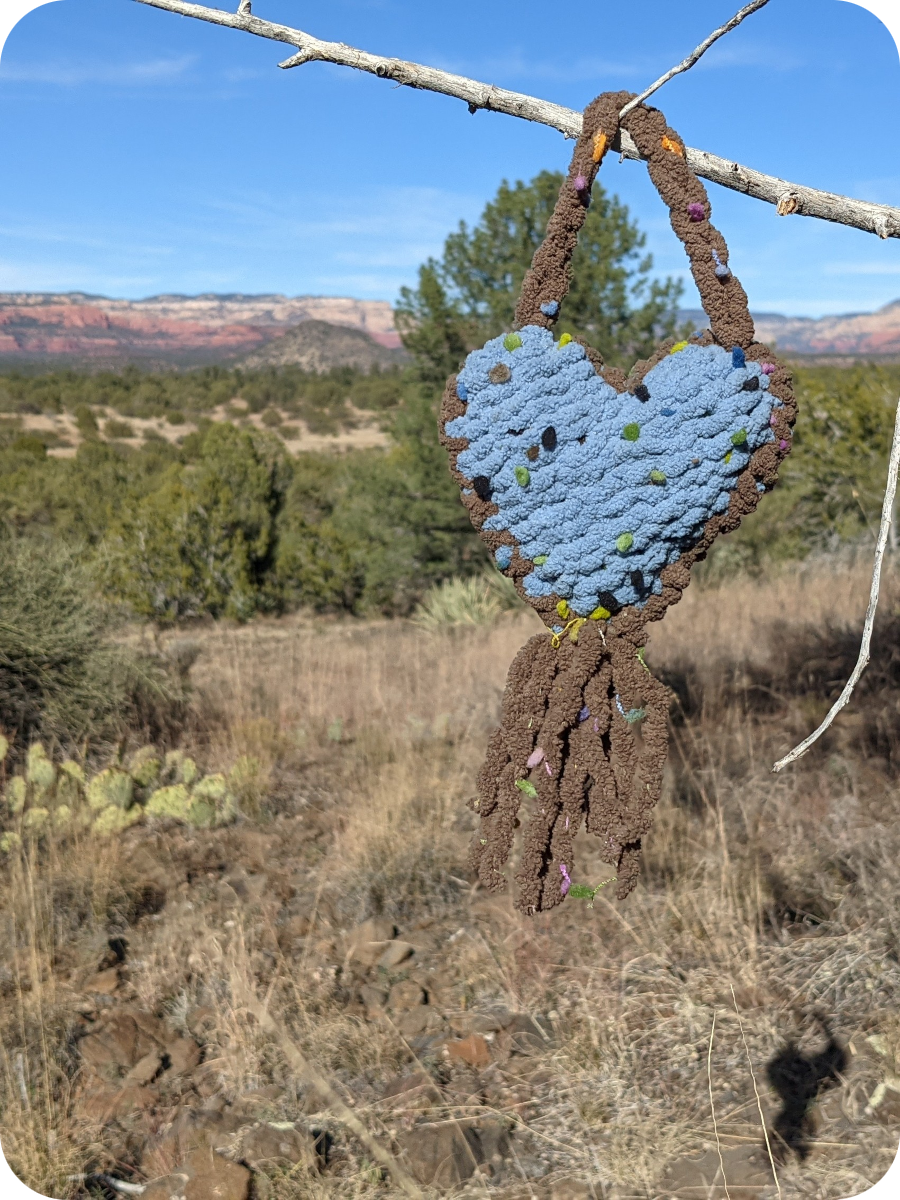
Super Bulky yarn, 6mm needles, 5"/12.5 cm wide, and so puffy!! :-D
10/18/2022 Pattern: M'sters KXS!
Click here to download the .pdf directly. Pattern is also available on Ravelry.
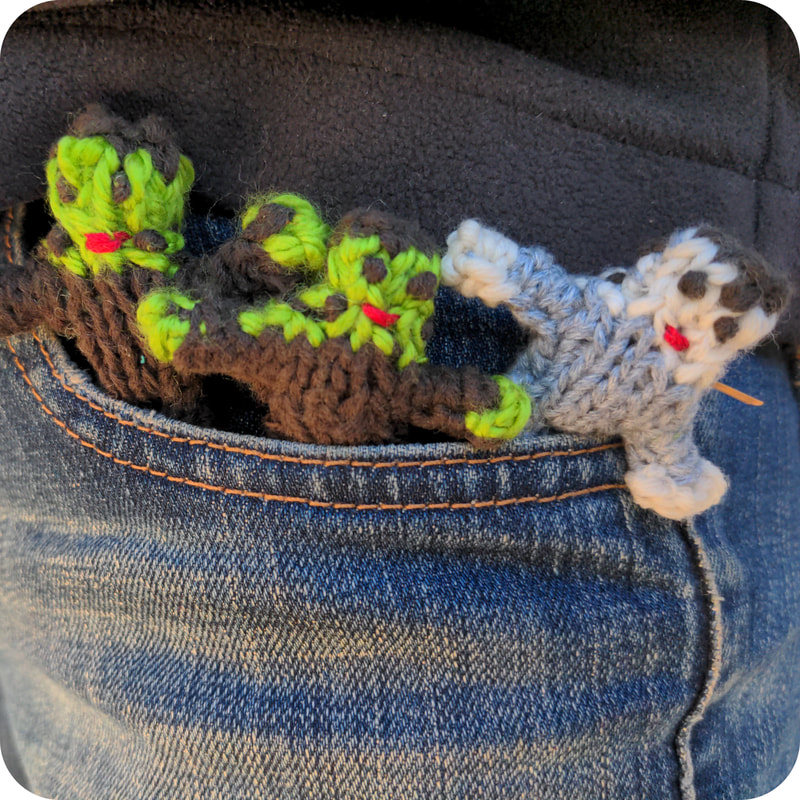
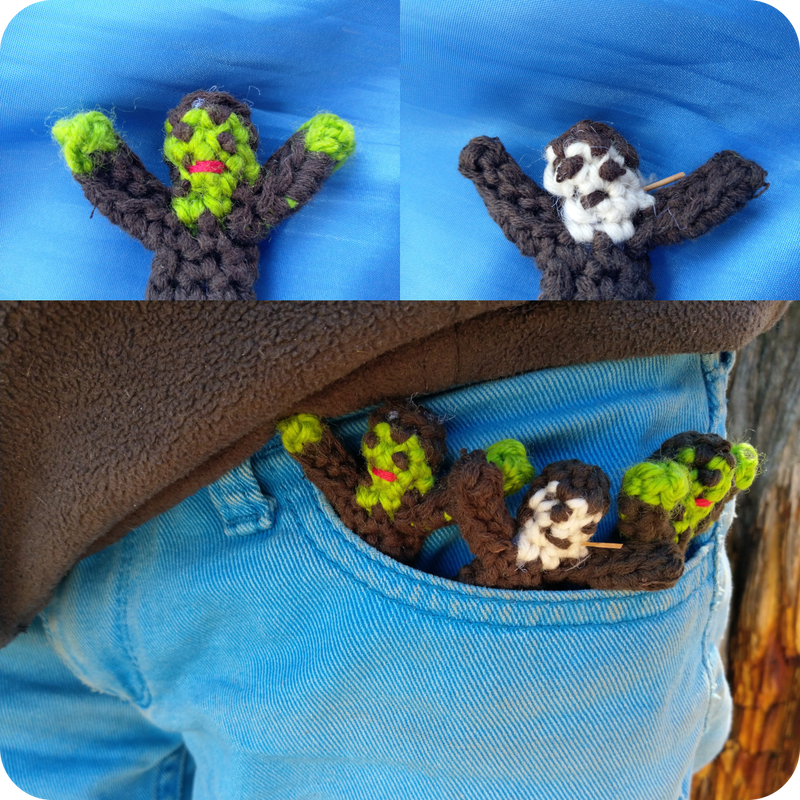
Quick Facts: -Yarn: 10-12 yards/meters of medium to dk weight yarn (7.25 yards/7m in a Main Color, 2.6 yards + 12" piece/2.5 m + 30 cm (samples use Mainstays Basic for the green and yarns from various unravelled commercially produced sweaters) -Needles: samples used 3.25mm needles. Use a needle that creates a dense gauge with your yarn without straining your hands. -Embroidery Floss for mouth: 5"/13 cm -Finished doll measures about 2"/5 cm tall and has a wingspan of about the same distance -After getting into the swing of it, you might be able to memorize the pattern and take about 45 minutes to make each doll. I am excited to give to you the latest development in my Crocheter's Delight: Trick-or-Treater's Disappointment series! I know this is a knit pattern, but when I first started handing out trinkets (instead of buying candy), the trinkets were crochet, and the name stuck, at least for now. I'm particularly pleased with how I overcame the challenge of making the doll in one piece without having to create arms separately and sew them on later. If you are a beginner, this pattern may test your skills. First of all, it is small and fiddly, there are increases and decreases, mid-row cast-on and bind-off (to create the arms), putting stitches on hold and picking them up later (to create the second leg), but I hope none of this deters anyone. After a doll or two, you will probably get the hang of it. During the design process, I naturally made several of these and eventually had the pattern memorized and could make one in about 45 minutes from cast on to completion. I enjoy making handfuls of these little guys to hand out on Halloween, and even though I named the series of patterns "...Trick-or-Treater's Disappointment," I have never received complaints. On the contrary, I have received many compliments and smiles in return. Come to think of it, I was on foot those years that I started this tradition, and I think I would have seen them discarded on the ground if they were truly disappointing, or at least, as disappointing as the other litter one sees after a Beggar's Night. So they weren't as bad as litter, I suppose, ha! If you decide to hand them out instead of candy, I hope for nothing less for you. Make a Michael Myers version of the doll by using blue for the Main Color (his jumpsuit) and stick a pine needle (or the end of a toothpick) in his neck to represent the knitting needle that didn't end up killing him ;-) I'm using mine, which spent a year at the bottom of a heavily used backpack with some mint that had been picked fresh and also spent about 6 months down there, as a hair accessory. I had a metal barrette with plastic cover from about 1989, and I just wiggled the straight metal part through a stitch on the doll and slid it all the way down to the end so it is kinda dangly. Stick hooks in them or apply a chain to make hanging ornaments. Probably not a good idea to give the "knitting needle" version to small children. There is a crochet version available that is less fiddly and takes less time to create, so you can check it out here on my blog (or here on Ravelry) if you'd prefer that version. 6/4/2022 Pattern: Chunky No Clunky
Click here to download the .pdf directly. Pattern is also available on Ravelry.
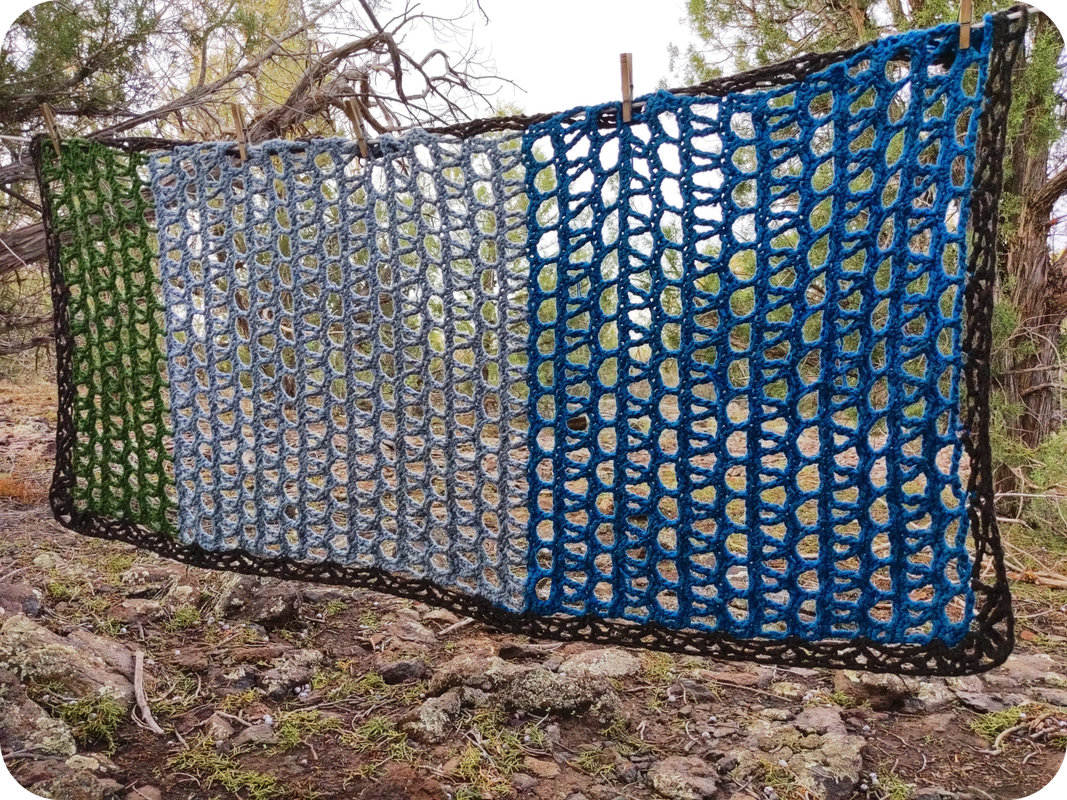
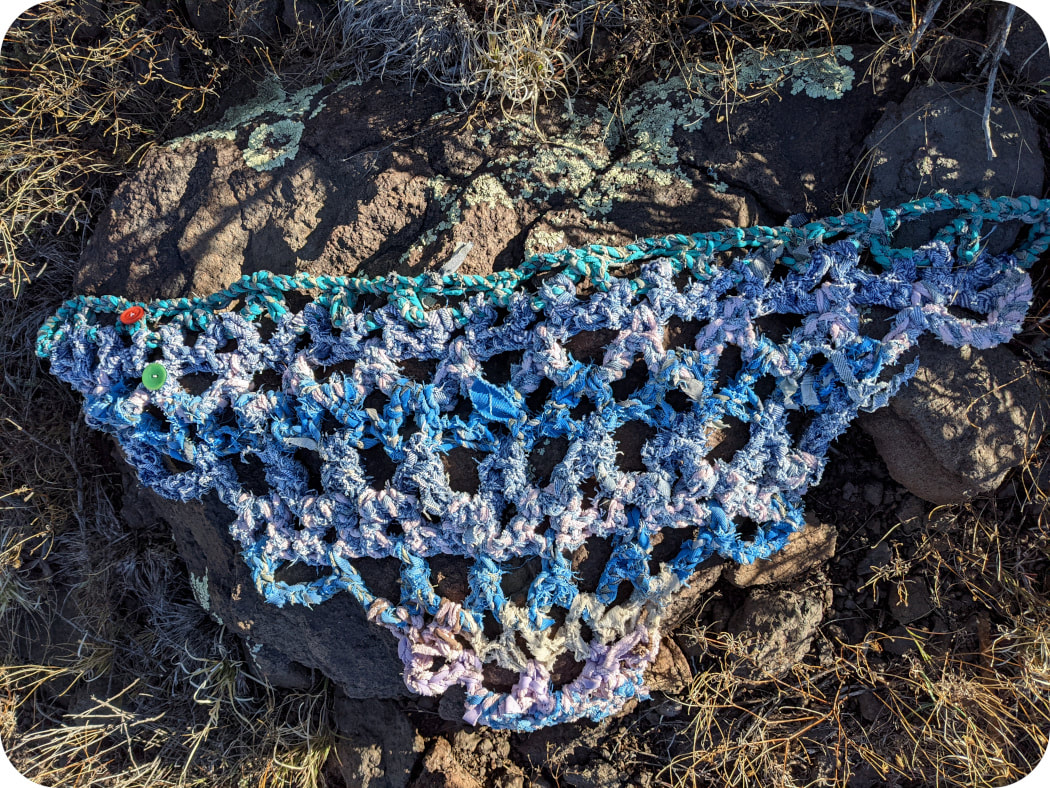
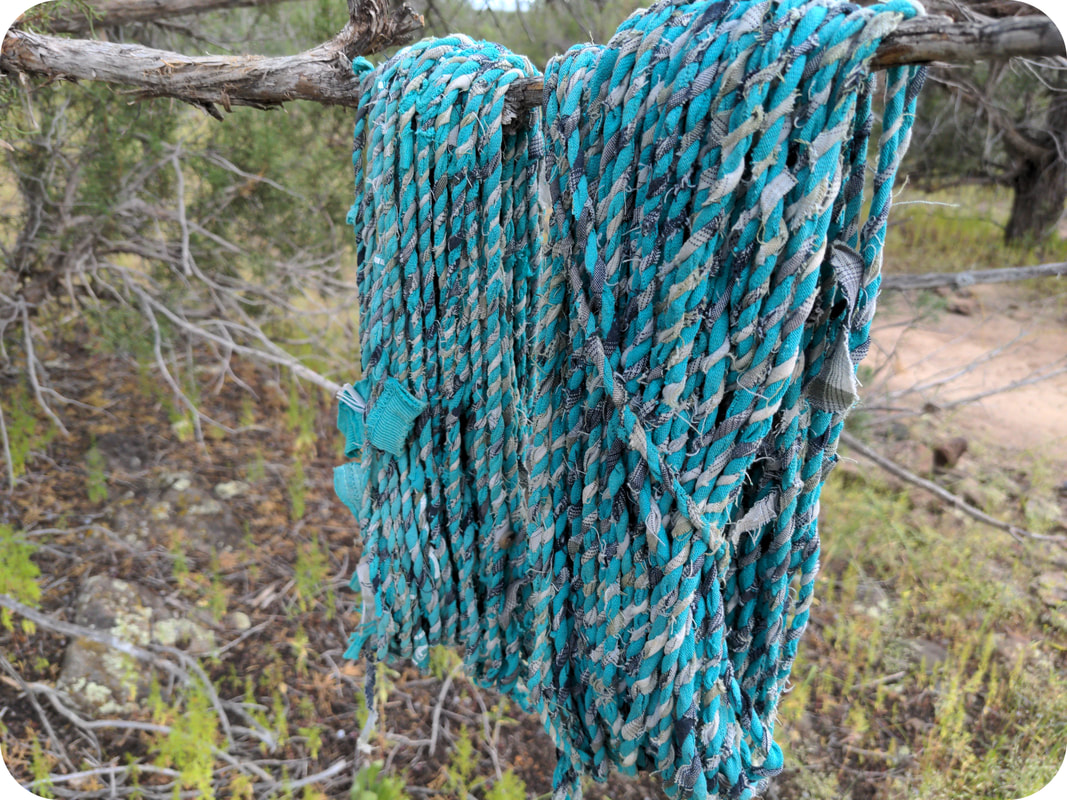
Chunky No Clunky was one of the first patterns I designed. It was born from a desire to make something from rag yarn that wasn't a rag rug. I like rag rugs, they're quite comfy and can be durable, and I've made one, and it was fun and very pretty, but I longed to go beyond the confines of the rag rug. As it turned out, the design was fairly popular among friends and strangers whenever I wore it. In fact, in the 12 years since I designed it, I've never worn one more than once because each time, someone commented on how they liked it, and they seemed so intrigued that I felt compelled to take it off my neck and give it to them. The way I'm saying this makes it sound like I've done this a lot of times, but in reality, it's only happened twice, but those two were the only two I had ever made until recently. The first was a friend who had come over to hang out and the second was a girl about my age (at the time) who was sitting next to me on the bus I was riding from Ohio to Indiana. I'm still kinda bummed about having given that one away as it used some fabrics that had high sentimental value to me, but in the end, it's a good exercise in non-attachment. When I designed and made the original, I had a certain cousin in mind as a recipient because she has always been a funky-chic type of person (at least by my judgement), and I always wanted to make one for her. Fast forward to last summer, and I finally got around to making more spun rag-yarn again so I was able to carry out my decade-long intention of making and sending one to her. She never acknowledged that she received the package, so either she thinks it's fugly or she is just busy and forgot...or the package was stolen from her porch! At any rate, it sure feels good to check that one off the list! Over the winter, I was able to make a few samples and make a start on what will hopefully be a version for myself which I will be KEEPING, no matter who makes what comment on it. The one I intend to keep has rag yarn spun from one of my favorite t-shirts and one of Adam's old shirts (pictured above-right), so that has particularly high value for me. I am still waiting for my purple shirt to wear out enough for me to justify cutting it into rag yarn so that I can finish spinning the purple yarn that I want. So far, I've got three rows made which is what inspired the 3-row version pictured in the pattern's gallery. Quick Facts: -96 yards/91.5 meters total super bulky yarn or rag yarns (amount of each of the 4 colors used ranges from 18-31 yards/17.25-29.5 meters -10 mm hook or size to obtain a fabric that pleases you -finished wingspan and depth: 39"/97.5 cm x 16"/40 cm -starting chain in multiples of 4 makes it relatively easy to customize the wingspan and depth 7/28/2021 Pattern: Shift+Granny
Click here to download the .pdf directly. Pattern is also available on Ravelry.
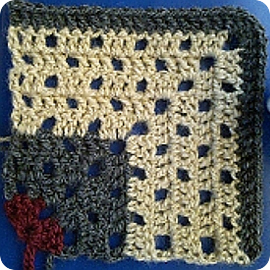
While designing a blanket that would feature granny squares, I knew I wanted them to have mitered construction, and while I was noodling around, I wondered what it might be like if I made the first and last stitch of the granny cluster into the stitches before and after the chain space, respectively. I liked the look of it, and thus, Shift+Granny was born. It's a small change that, in my opinion, has a noticeable effect on the overall look of the granny square. It is by far my most downloaded pattern as of this writing. Quick Facts: -one square uses about 30 yards of bulky weight yarn and measures 8"/20 cm -6.5 mm hook used in sample -designed specifically for Squares Dancing in Harmony afghan pattern 7/27/2021 Pattern: Squares Dancing in Harmony
Click here to download the .pdf directly. Pattern is also available on Ravelry.
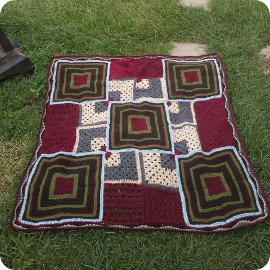
Upon hearing my step-dad's comments on a blanket I had recently finished, I became inspired to create a blanket especially for him that incorporated one of the design elements from that original piece. I asked what he would like the colors to be, and he wanted Earth Tones. So I expounded upon the Earth Tones theme and designed Squares Dancing in Harmony to reflect various elements of nature and life...the ups and downs, the layering and mixing of different experiences and beliefs. As such, it incorporates both knitting and crocheting. Quick Facts: -sample uses Lion Brand Jiffy which is, I believe, discontinued. Any bulky yarn should suffice. 540 yds/491 m in each of two colors, and 270 yds/246 m in each of 4 colors. -sample uses 6.5mm hook and 6 mm needles for crochet and knit portions, respectively -each square measures 8"/20 cm for a 54x54"/1.35x1.35 m afghan -squares are seamed together and a border is crocheted in rounds around the piece 7/27/2021 Pattern: Ever Evolveeeng
Click here to download the .pdf directly. Pattern is also available on Ravelry.
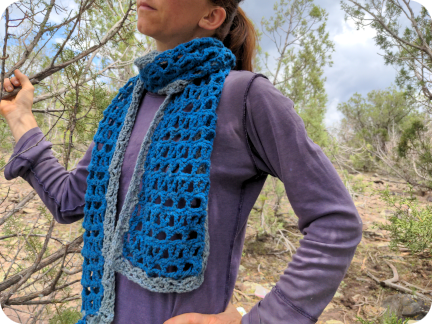
Ever Evolveeeng arose from a continued study of the V-stitch. I designed it specifically to be used in the Squares Dancing in Harmony pattern but published the square as a standalone pattern. Someone on Ravelry created a scarf out of the pattern that gave me the idea to include instructions for not only a scarf, but also for a stole. Then while I was creating samples, I decided to add a border, so here we are! Now the pattern embodies its name even more than it did before! Quick Facts: -afghan square originally used about 50 yards/45 m of bulky yarn and a 6.5mm hook -scarf will take around 400 yards total and stole will take around 800 yards total -vary the hook and yarn size to alter the drape of the fabric -afghan square can be used as a gauge swatch if needed for the scarf/stole -in the words of the Ravelry user: it works up ridiculously quickly. I made the stole in about 3 days and the scarf in about 2, including piddling around with designing the border. |
Archives
February 2024
CategoriesAll Eats Gear HSFRL Lifestyle Nugs Opinion Patterns Recipies Travel 
|

 RSS Feed
