|
5/24/2018 The Wheel
When you're on the road for long periods of time, the ability to perform your own bike maintenance really comes in handy. I've certainly had to adjust my derailleurs and brakes a fair amount of times, changed more than a few flats, replaced some broken spokes and spent more time than I'd like truing a wheel that just wouldn't stay true. More recently I can add building a whole new rear wheel and derailleur installation to that list.
Building a bicycle wheel is no small task that requires a good amount of patience and, when you're out in the sticks, a little improvisation. Now you might be wondering why someone in my situation would go about such a task in the first place, so perhaps a little backstory is in order. The stock rear wheel on my bike has had almost daily problems since we first set out. Our first night out I found the bike perilously unstable, but didn't have time to look into it and just assumed it was a complication of riding with a lot of gear. After over a week of riding like that, I discovered that several spokes had worked their way out of their nipples leaving the wheel unsupported in some areas. This left the wheel permanently bent and almost impossible to true.
I was able to get the wheel back into riding condition by messing with the spokes, but the wheel was misshapen so I was bobbing up and down as I rode. Later the wheel was plagued with near daily flats. A trip to a bike shop in Pittsburg, Kansas revealed the manufacturer had improperly installed the rim strip. It wasn't cut wide enough so the strip did not completely cover all of the spoke nipple holes, allowing the inner tube to squeeze its way in where it would get sliced open by the edge of the rim strip.
I had also been having trouble with the spokes working their way out of the nipples, I had to true the wheel every couple of days. The gentleman in Kansas informed me that a little Loctite placed on the nipples should help keep the spokes from vibrating out. Unfortunately, I wouldn't come across any Loctite until Edmond, Oklahoma! It did, however, do the trick. That is, until spokes started breaking. My first spoke broke on our way into Lamesa, Texas. I didn't have any spares and there are no bike shops in Lamesa, but luckily we found a Warm Showers host, a web community for connecting bike tourists with hosts for a day or so, in Lubbock that would graciously pick us up and host us a few days while I repaired my bike. The freewheel proved tough to remove, but our host happened to have a 25" pipe wrench that did the trick, the key with freewheels is leverage. After that, three more spokes would eventually break and the gentleman who removed my freewheel for $5 in Santa Fe informed me this was most likely due to uneven, or too much, tension on the spokes or. I knew there was a lot of tension, but it was necessary to keep the wheel from fishtailing. Even still the wheel was dished all the way to the left with as little tension on the left spokes as possible while the right spokes were tightened to the breaking point apparently. Thankfully my mother and brother agreed to an early birthday gift featuring the parts necessary to put my bike back in good working order. A quick search on Amazon turns up quite a few pre-built wheels and this was, as you can imagine, my first inclination. After a few days looking at options, however, it became apparent that a pre-built wheel well-suited to my lifestyle wasn't going to come cheap. While there are plenty of cheap options, it's not likely they'll be able to carry a cyclist plus 90 pounds of gear across paved, dirt, and gravel roads over thousands of miles. I already knew a bit about hubs so I took a quick look at rims and figured I could probably put together a wheel custom built for my application without shelling out nearly the asking price for a similar pre-built wheel. By this time, I've trued a wheel many times so, really, I'd already learned a lot of what it takes to build a wheel anyway. The star of the show would be a sturdy double walled, double eyeletted rim constructed out of an aluminum alloy boasting a stronger strength to weight ratio than the standard 6106 alloy. The Mavic A 719's product page describes it as "bomb proof" and while I don't anticipate testing that claim, my last rim proves that, at least in my situation, the rear rim is not the right place to cut corners. In addition to the bent rim, I would occasionally hear clanking noises while coasting that seemed to be coming from the freewheel or hub. Plus I'd been wanting to replace the derailleur for a while as the stock part, a Shimano Tourney, didn't seem to work well with the stock seven speed freewheel's "Mega Range" gear. The Mega Range gear was a 34 cog, or tooth, sprocket that was larger than the typical large sprocket on a seven speed freewheel or cassette. The Tourney had a lot of trouble shifting into this gear which seemed to be at or beyond its maximum capacity. This was the most useful gear for climbing steep hills and mountains so you can imagine trouble shifting into it, if being able to at all, led to a lot of lost momentum. 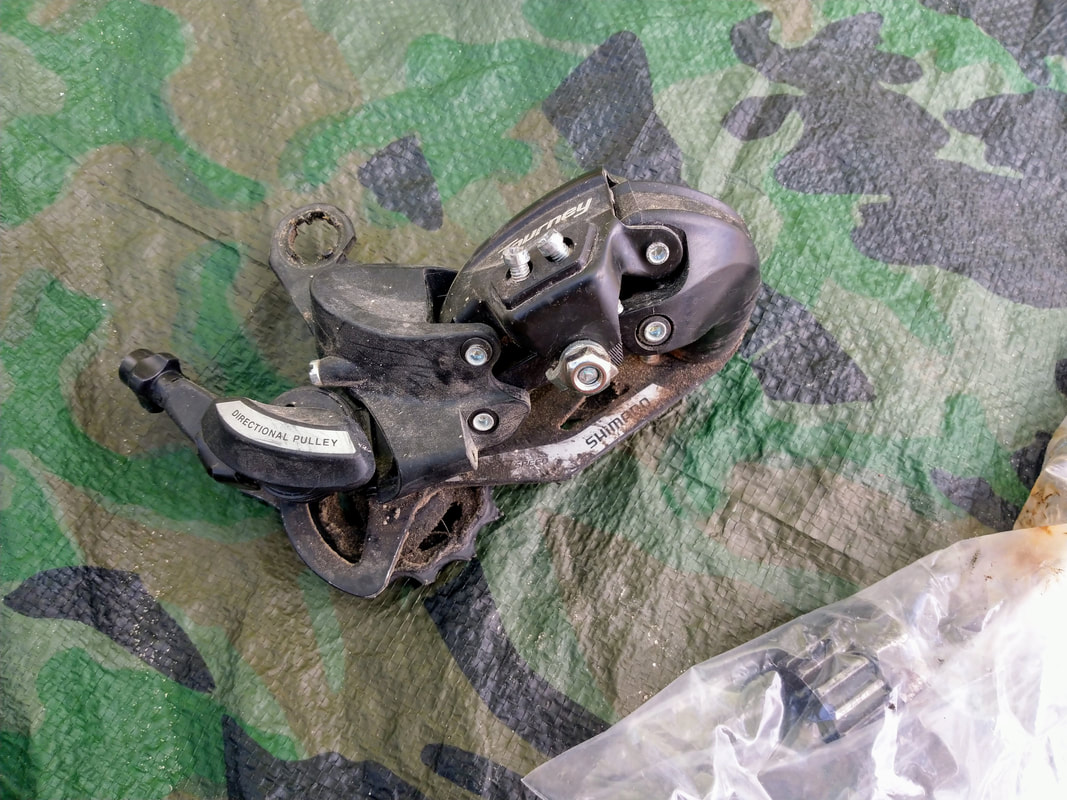
The old Shimano Tourney
Now that I'm building a wheel, I'll need a new hub, but do I go with a cheap freewheel hub or freehub and cassette? I've had bad luck with freewheels, which have been outdated since at least the eighties, plus they're notoriously hard to remove if, for instance, you need to replace a broken spoke. The freehub was a no brainer, but required a new cassette to replace the freewheel. This was the right time to fix the error made by the manufacturer and ensure the cassette and derailleur pair well. A Shimano "HyperGlide" 8 speed cassette mated with a SRAM X4 long cage rear derailleur should be the ticket to fix my shifting problems. The cassette features cogs specifically designed to help the chain glide from one sprocket to the next while the derailleur sports an actuation ratio of 1:1, as opposed to Shimano's 1:2 ratio, which I expect to result in fewer derailleur adjustments.
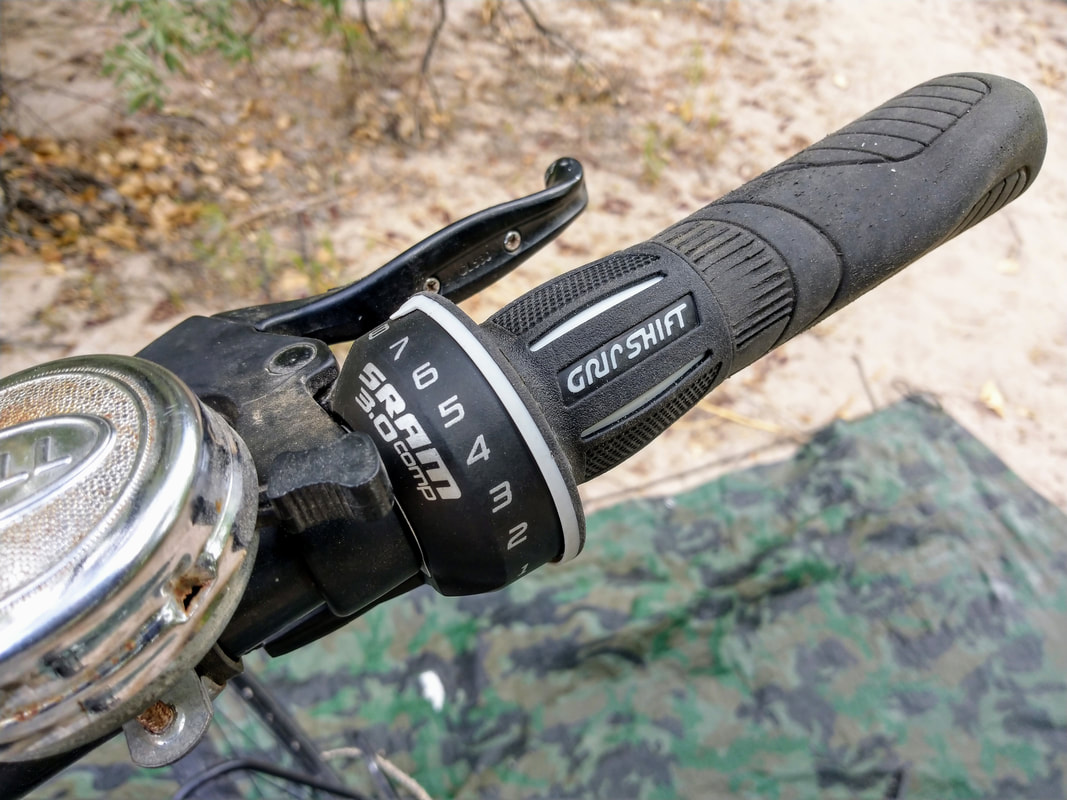
Shimano's 1:2 ratio means that the derailleur moves twice as much as the cable is pulled while SRAM's ratio is more of a "what you shift is what you get" approach. I feel as though Shimano's method makes it easier to shift between gears, but results in frequent adjustments to the derailleur which is more sensitive to subtle differences in cable tension such as that caused by changing temperatures. Throughout the winter I found myself having to adjust my Tourney several times a day as the temperature warmed from morning lows and then cooled again as evening approached. A new derailleur with a different actuation ratio and an 8 speed cassette, paired with a Shimano Deore XT hub, means a new shifter is in order. I happen to like the twist shifter style, rather than the more common trigger shifter, and SRAM only has one low-cost 8-speed grip shifter, the Comp 3.0, so this wasn't a hard decision. Throw in a sack of spokes and nipples and this thing is ready to ship! Shipping, as you can imagine, can be a bit of an issue when you're living on the road as I am sure many an RVer can attest. Jenny and I found ourselves in a place where we can stay long enough to wait for Amazon's free shipping option, but where do we have the items sent? This proved a learning experience on using the United States Postal Service's General Delivery. General Delivery items are delivered to the post office that services the adressed area, they are then held until the addressed recipient comes to claim them, with proper ID of course. You address an item normally, but in place of the street address you write "General Delivery" and the post office will know what to do. There are some caveats here. UPS and FedEx will not deliver General Delivery items. If UPS receives an item addressed to General Delivery, they will handle it all the way to their destination package handling facility then list the item as undeliverable due to a missing address. At this point you need to contact the seller and have them contact UPS to change "General Delivery" to the Post Office's street address. This doesn't always work, I'm told, as some Post Offices will accept the package and hold it for you, some won't. They say you have better luck in rural areas where the Post Office has a smaller clientele and that's exactly where we were so it worked. All is not lost with UPS and FedEx though. UPS and FedEx ground/air will not deliver General Delivery items, but UPS SurePost and FedEx SmartPost will. The latter two services are handled by UPS or FedEx while in transit then handed to the USPS for delivery and since the USPS accepts General Delivery items they just hold it at the Post Office just like they would if the package had been sent via them in the first place. In this case, it's good to note that the tracking information on the package might have an entry saying it was handed to the USPS for delivery and then another entry saying it was undeliverable. This is, presumably, because UPS and FedEx tracking services don't have an entry for a package being held at the Post Office, just go to the Post Office and it'll be there. At least that's been my experience. My Amazon order arrived in six shipments. Two were sent via USPS, two UPS ground, one UPS SurePost and one FedEx SmartPost. I must say that all of this, while certainly frustrating at times, has proved invaluable as a learning experience. I've learned new skills, discovered how to receive package shipments without an address and had a really great time putting all these bike parts together. The build itself couldn't have gone better. While the internet does have a reputation for false and misleading content it is also a treasure trove of do it yourself tutorials. I read several tutorials on the subject of building bicycle wheels and, as it turns out, building bike wheels is an art form where each individual has their own technique and takes great pride in their craft. For anyone interested I would suggest a quick internet search, but more specifically the late Sheldon Brown has a very detailed article on the subject. First up, the wheel build. Building a bicycle wheel isn't as simple as just screwing in a bunch of spokes. The spokes are an integral part of the wheel construction, they don't just hold the rim to the hub, they mold the rim into a nice straight and round shape. By adding and removing tension to individual spokes you can move small sections of the rim left, right, up and down. The goal, of course, is to get the rim centered over the hub, straight horizontally and round vertically. You do this by tightening and loosening individual spokes in small increments, this is called truing the wheel. When a wheel is centered, straight and round it is considered true. Assembling the wheel parts wasn't too much of a task, but it was time consuming and one needs to read the tutorials carefully. A little lube in the nipple holes and some Loctite thread locker on the spoke threads to keep them from vibrating out of their nipples. Lacing the spokes is something that one needs to pay close attention to as, so I've read, it's easy to make mistakes. There are different lace patterns useful for different applications, I chose a three cross pattern for its strength.
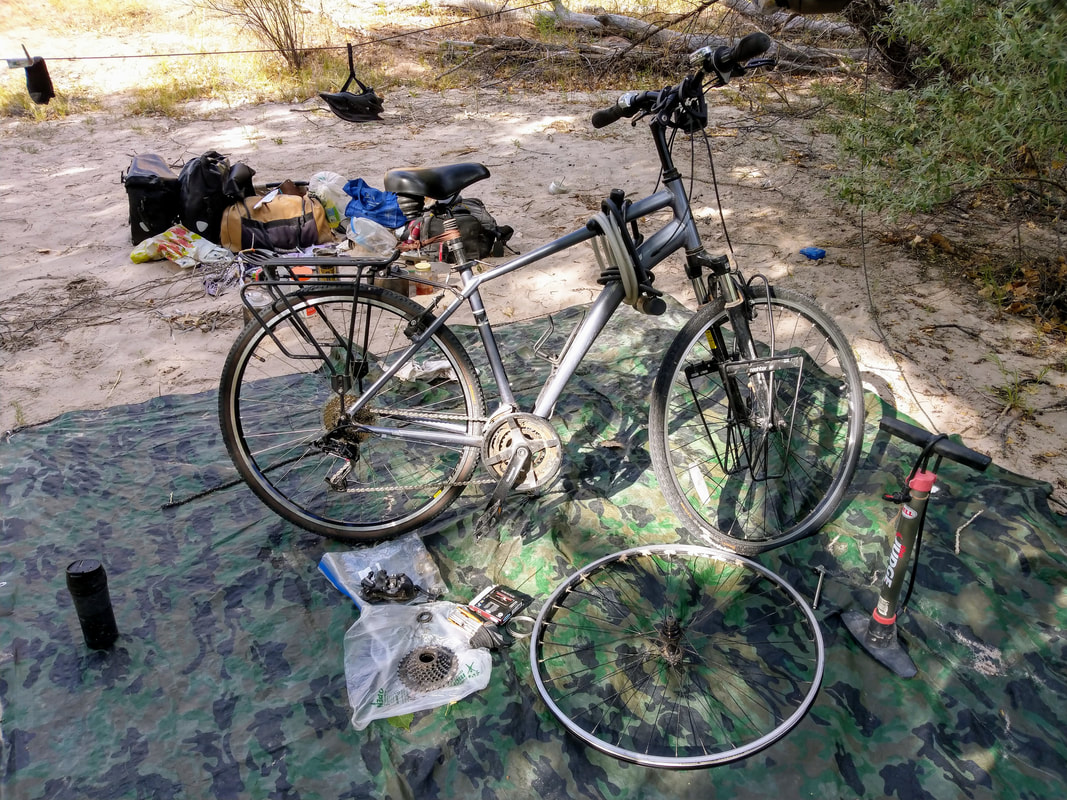
Once the wheel was together and felt strong it was time to upend the bike, take off the old wheel and use the bike itself as my truing stand for the new wheel. With the old wheel off, there was one quick thing I wanted to take care of. That little plastic spoke protector that goes between the hub and cassette or freewheel, I figured I'd reuse it if I could get the freewheel off my old wheel. I wasn't planning to put a whole lot of effort into it--if I couldn't get to it then so be it. While attempting to remove the old freewheel the lockring flies off and ball bearings spill all over the place! "Well I hope this works because I won't be using that freewheel anymore!" I thought. Well, at least I got to the spoke protector.
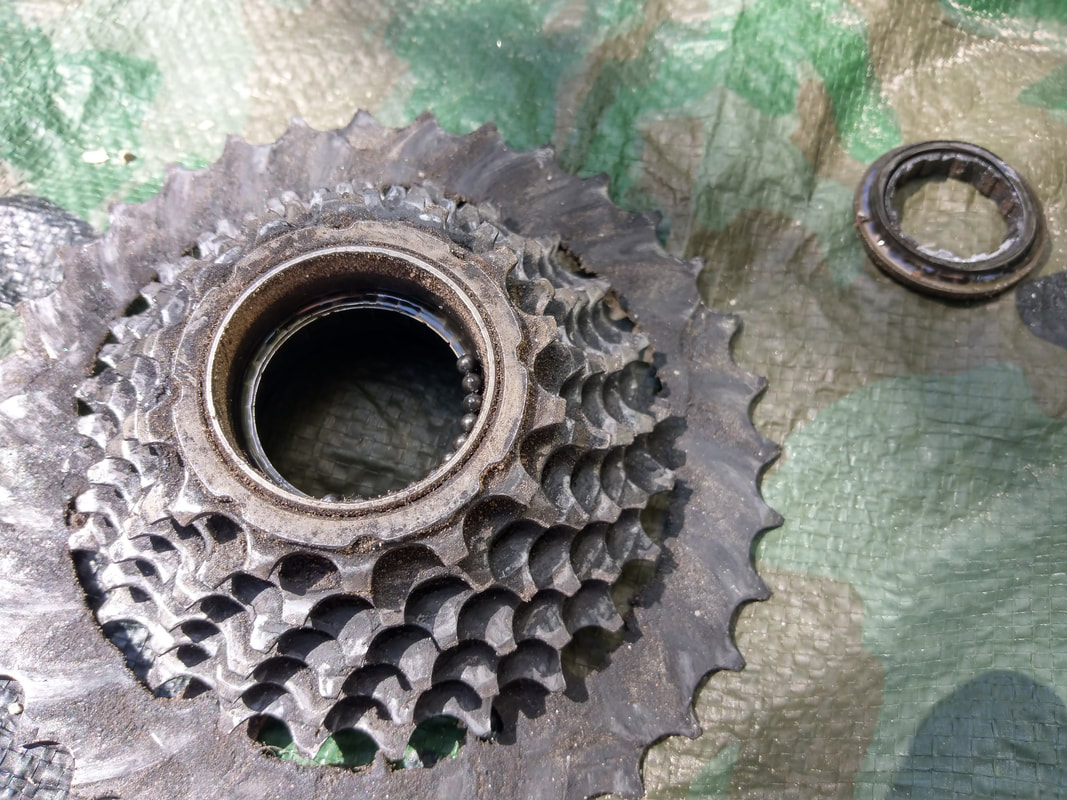
A broken freewheel
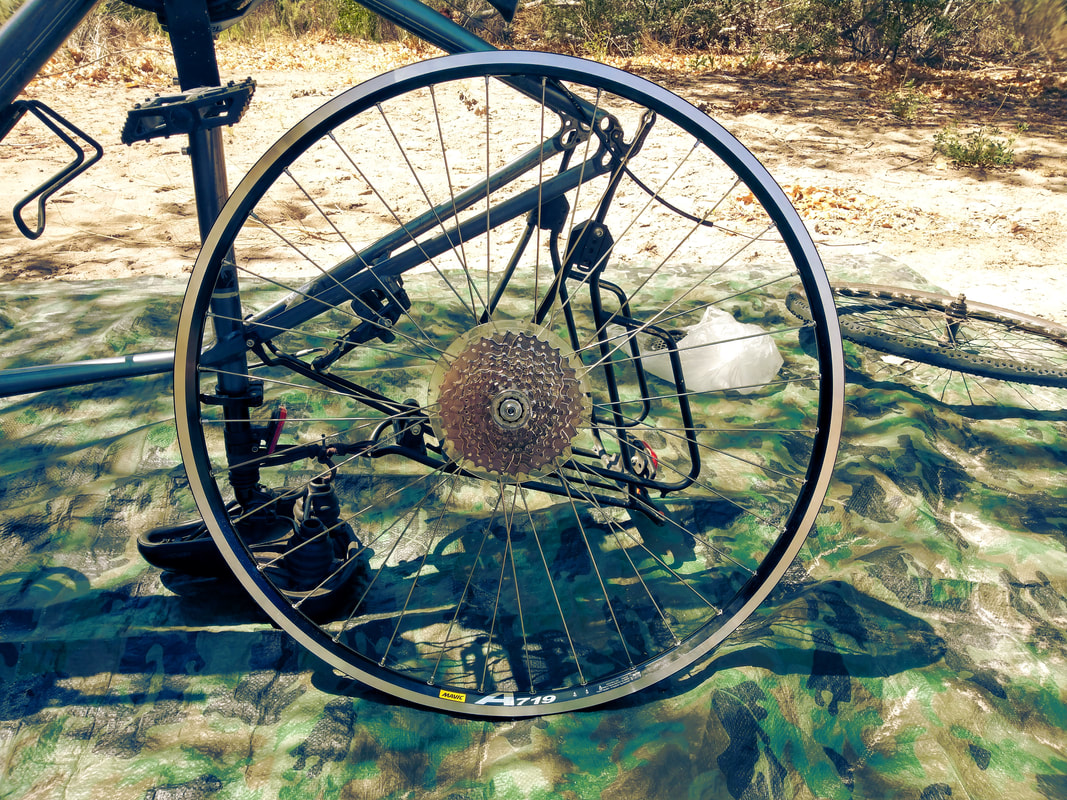
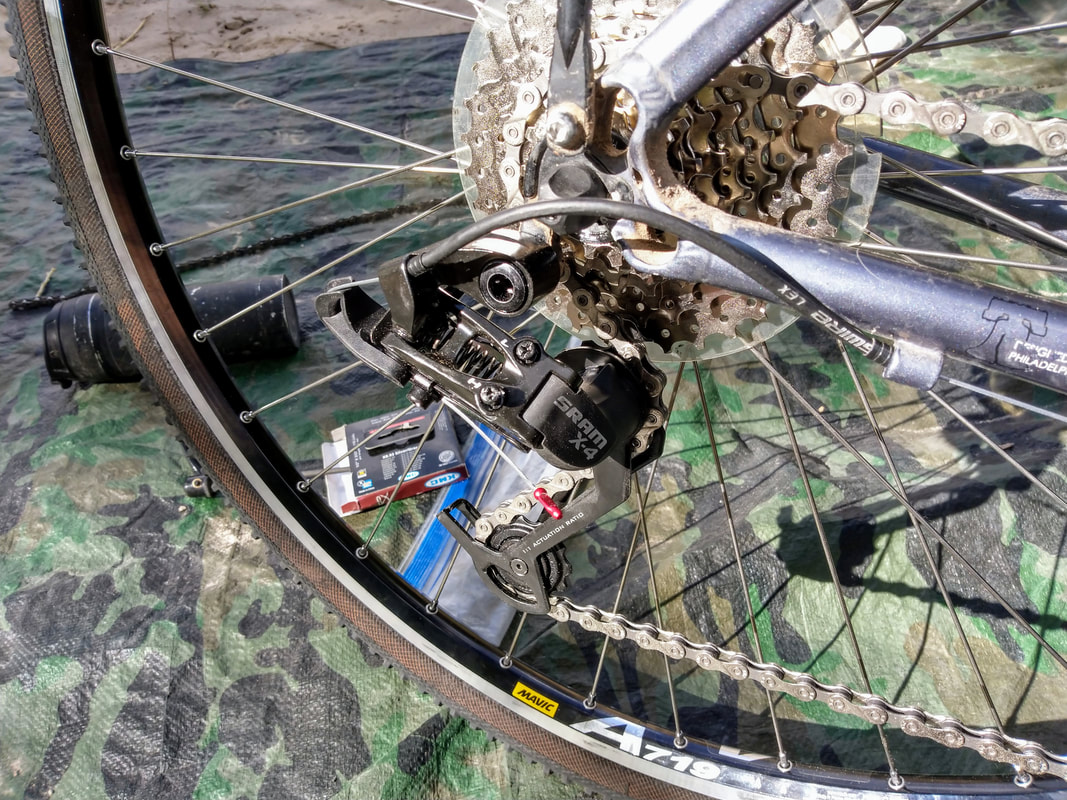
With the spoke protector in place I secured the new cassette to the hub and put the wheel up for truing. I have rim brakes so I was able to use the brakes to aid in the truing process. This method, which I've used frequently, consists of pushing the brake pad near the rim and gauging the distance of the pad from its reflection in the rim while the wheel turns. I watched as the reflection ebbed in and out, tightening and loosening as the wheel came ever more in line.
Once there was little movement in the brake reflection I moved on to vertical truing. Luckily there wasn't a whole lot to be done here. To look for high spots on the wheel I took the quick release axle from my old hub, held it up against the frame chainstays slowly moving it closer to the spinning wheel. Ting... ting... ting... There's the high spot! Tighten, check again, tighten, check again, etc... Check for horizontal trueness, correct, and then move on to dishing. Dishing refers to the whole rim's centeredness. Because of the freewheel or cassette a rear wheel is usually off center to the left and this case was no different. Tighten all the spokes on the right, check, tighten, check, tighten, etc... Check and correct horizontal trueness, check and correct vertical trueness... One of the advantages of having a true wheel, if you have rim brakes like myself, is better stopping power. If the wheel is untrue you have to increase the distance between the brake pads and the rim otherwise they rub the rim while riding. This makes the brake lever cushy and the brakes less effective. A true wheel is much safer on the road or trail. 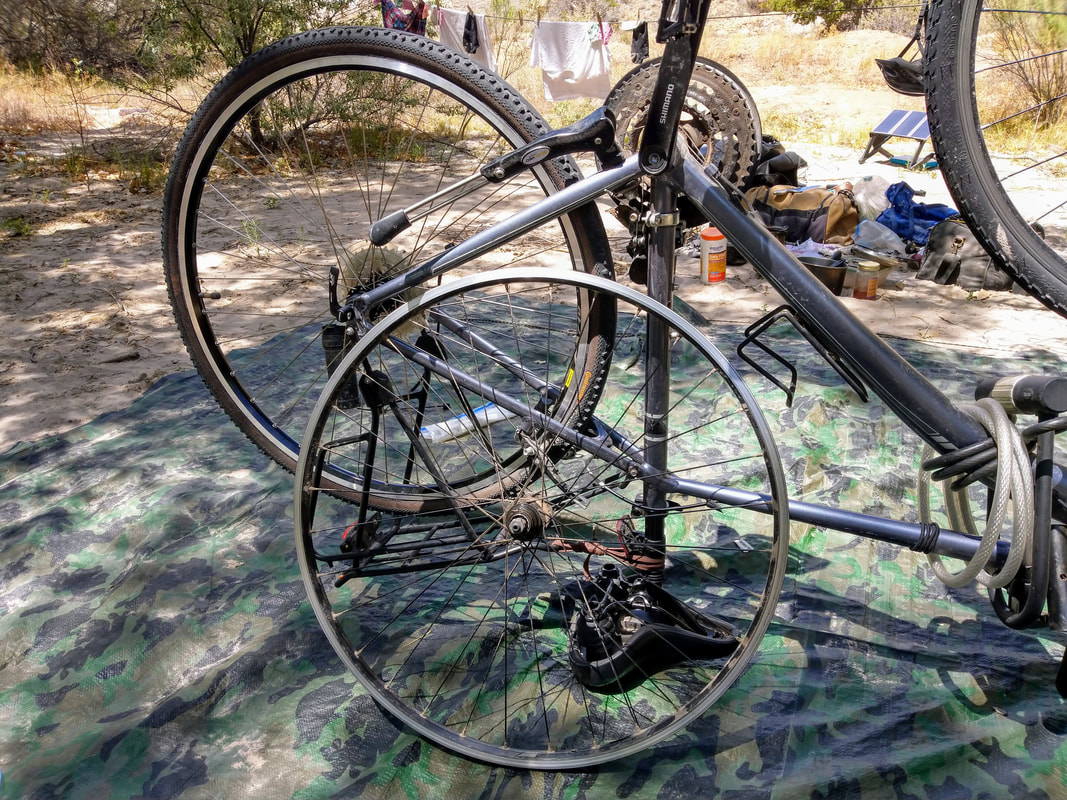
The new wheel on the bike with the old lying up against the frame
With a true wheel it was time to install the derailleur which just bolts on lickety split. The only thing I needed to pay attention to is the b-adjustment screw which needed to be positioned behind a little notch on the derailleur hanger. After this, adjust the high and low gear adjustment screws to ensure the derailleur sprockets line up with the highest and lowest gear, then mess with the b-adjustment screw so that the derailleur sprockets are about 1/4" below the cassette sprockets. Slapped the chain on and moved to the final piece of the puzzle, the shifter.
The shifter just slides right onto the handlebars, but there was some effort when it came to routing the cable to the derailleur. The cable housing that led from the chainstay to my old derailleur was longer than it needed to be for the new one. I could've just let it be, but part of this adventure was learning how to make due with what I have out here so I attempted to cut it to size with the dull wire cutters in the pliers on our Leatherman gifted to us by Jenny's step father John. Well the pliers didn't do a wonderful job, actually they mangled it pretty good, but I was able to use the pliers to reshape the cut end back to a nice, fairly smooth, workable cable housing end by inserting the bottom part of the pliar nose into the cable housing where the cable should sit and squeezing the wires in the cable housing flat against the edge of the housing.
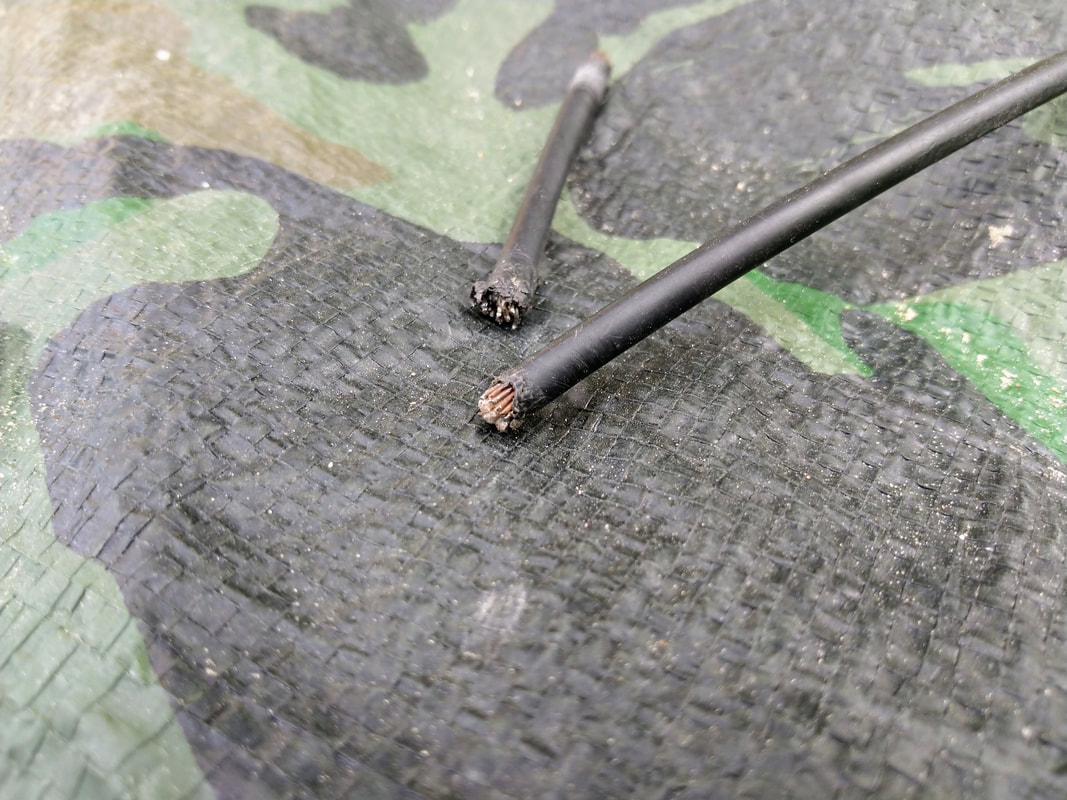
Both ends of the cut, one fixed with pliers and the other left mangled.
The Loctite I put on the spoke threads took twenty-four hours to cure so I didn't give the bike a good test ride until the next day. Rides like a dream!
|
Archives
February 2024
CategoriesAll Eats Gear HSFRL Lifestyle Nugs Opinion Patterns Recipies Travel 
|


 RSS Feed
